Understanding EtherChannel and How to Configure It: A Complete Guide for Network Engineers
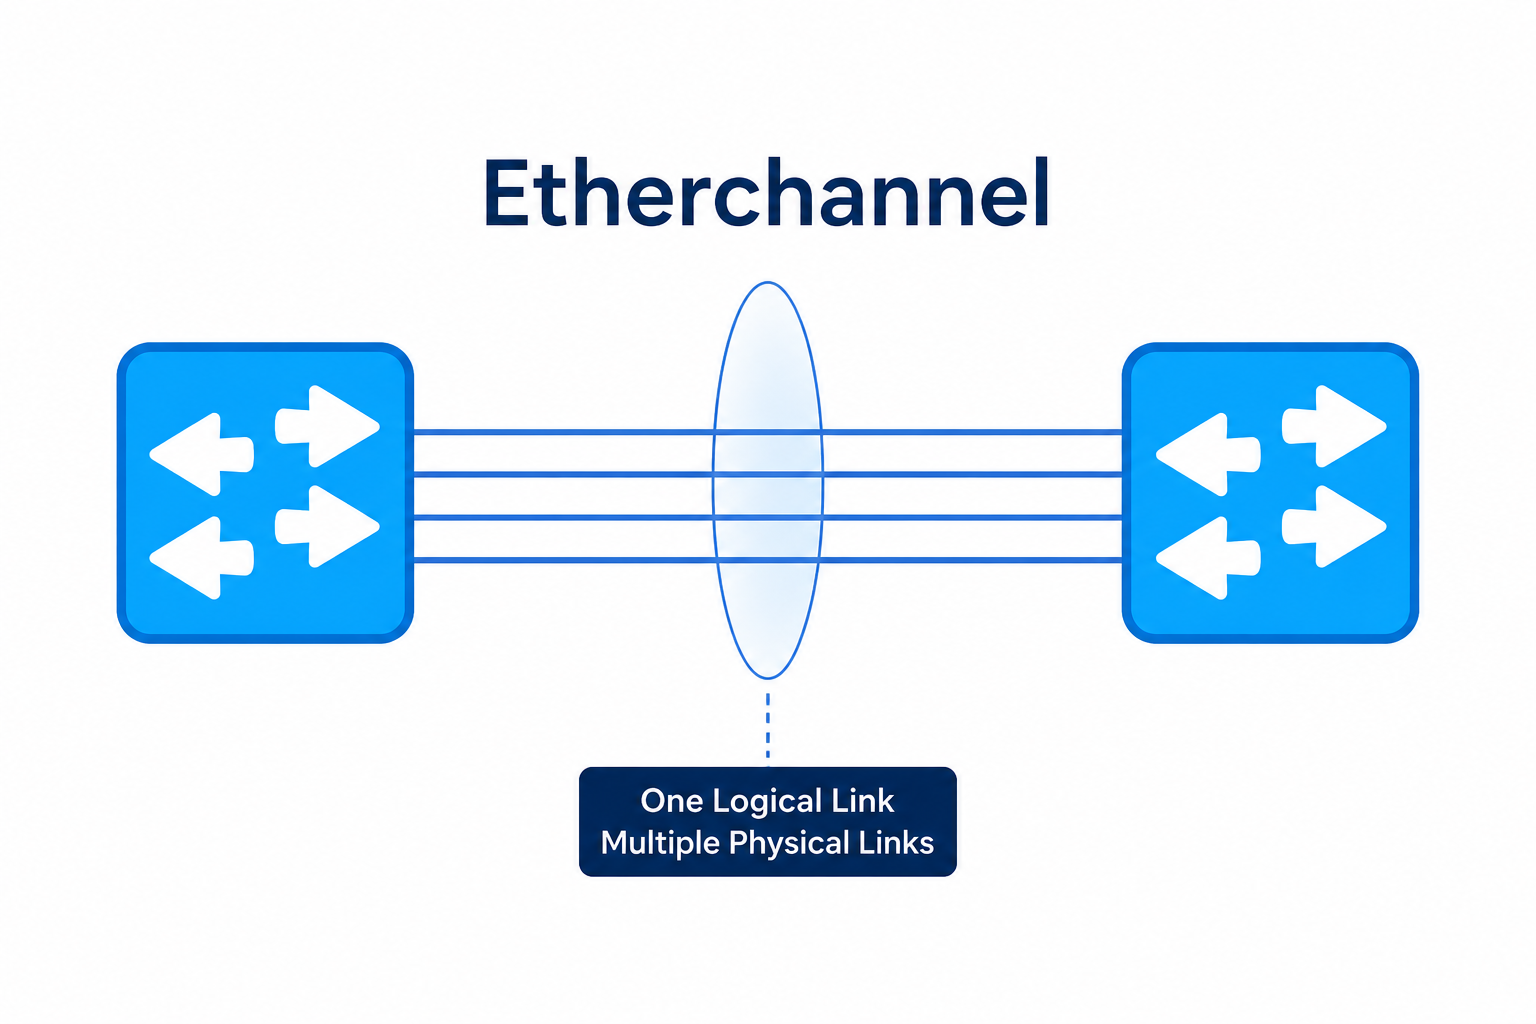
If you manage a campus or enterprise network, you have probably hit the same wall: a single 1 Gbps uplink between switches is no longer enough, but adding more links triggers Spanning Tree Protocol to block them. That is where EtherChannel steps in. In this guide, I will walk you through what EtherChannel does, how it solves real bandwidth and redundancy problems, and how to configure it on Cisco switches using both LACP and PAgP. Whether you are prepping for a CCNA exam or troubleshooting a live production link, this post gives you the commands, the logic, and the pitfalls to avoid.
Table of Contents
- What Is EtherChannel and Why Does It Matter?
- How EtherChannel Solves Real Network Problems
- EtherChannel Modes: On, LACP, and PAgP Explained
- LACP vs PAgP: Which One Should You Pick?
- Prerequisites Before You Configure
- Step-by-Step Configuration Guide
- Verifying Your EtherChannel Setup
- Load Balancing: How Traffic Actually Flows
- Common Misconfigurations and How to Fix Them
- Conclusion
What Is EtherChannel and Why Does It Matter?
EtherChannel is a Cisco technology that groups multiple physical Ethernet interfaces into a single logical interface called a port channel. Instead of treating four 1 Gbps links as separate paths, the switch sees them as one 4 Gbps pipe. This sounds simple, but the impact is huge.
Without EtherChannel, connecting two switches with multiple links creates a Layer 2 loop. Spanning Tree Protocol detects that loop and blocks all but one link to prevent broadcast storms. You end up paying for four cables but using only one. EtherChannel breaks that deadlock by presenting the bundle as a single logical link, so STP treats it as one path and keeps it forwarding.
Cisco supports up to 8 active links in a single EtherChannel bundle on most platforms, with some newer hardware supporting up to 16 links (8 active plus 8 standby) when using LACP. You can create up to 64 port channels per device, which gives you serious flexibility in large deployments.
How EtherChannel Solves Real Network Problems
Let us look at three pain points EtherChannel fixes in everyday networks.
1. Bandwidth Bottlenecks Between Switches
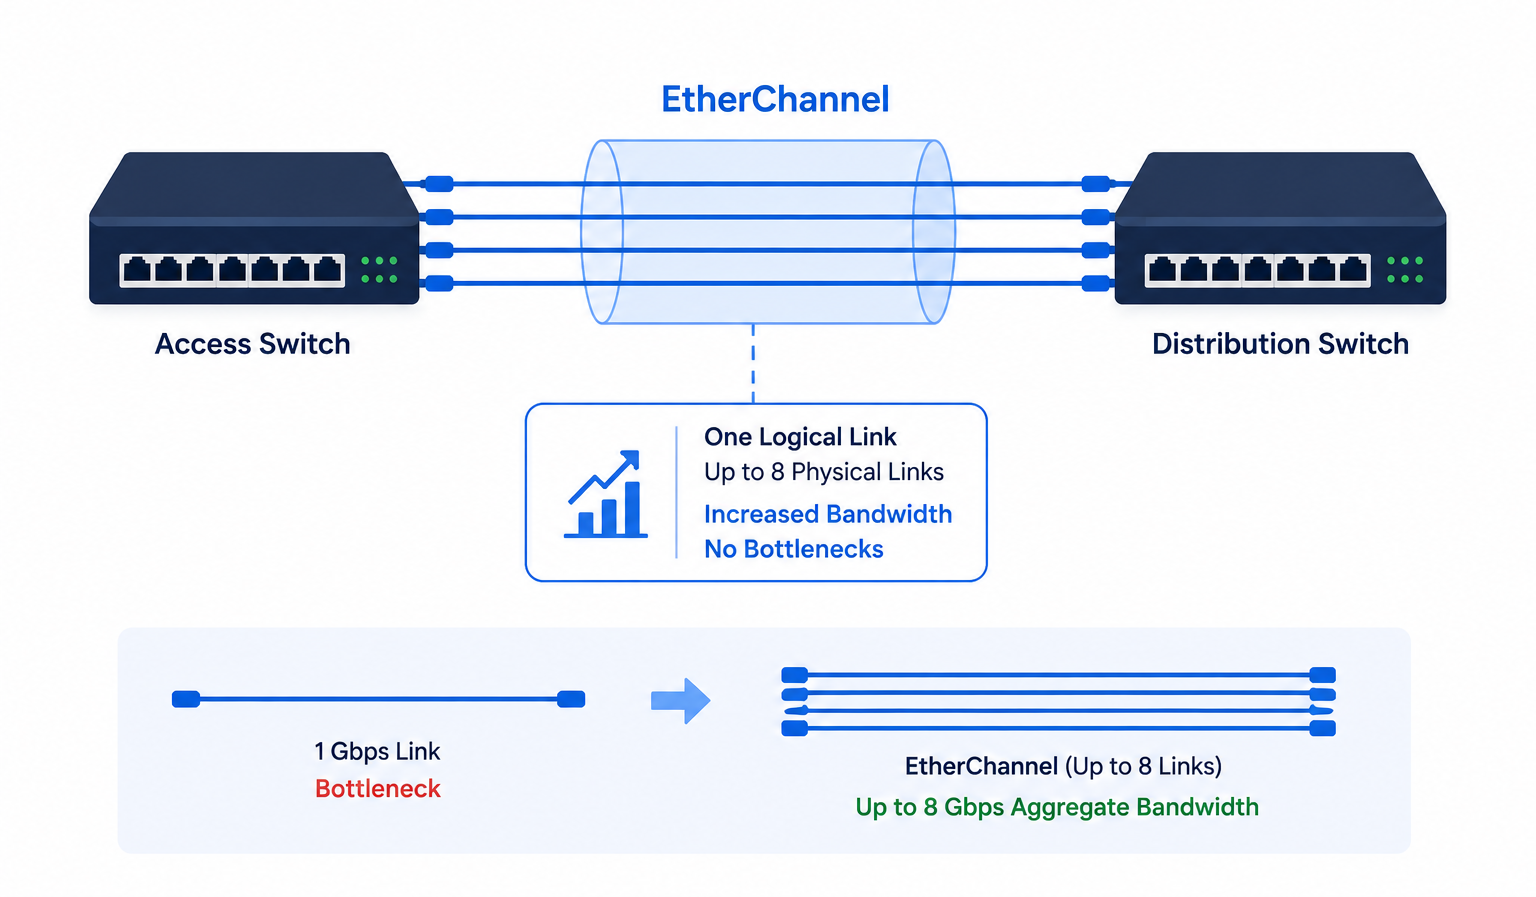
A single Gigabit Ethernet link between an access switch and a distribution switch can saturate quickly in modern offices. EtherChannel lets you stack up to 8 physical cables into one logical pipe. The aggregate bandwidth grows with each link you add.
Important caveat: A single traffic flow still travels over just one physical link. EtherChannel does not turn four 1 Gbps links into one 4 Gbps link for a single conversation. Instead, it spreads multiple conversations across the available links. So while one file transfer tops out at 1 Gbps, ten simultaneous transfers share the full bundle.
2. Redundancy Without STP Blocking
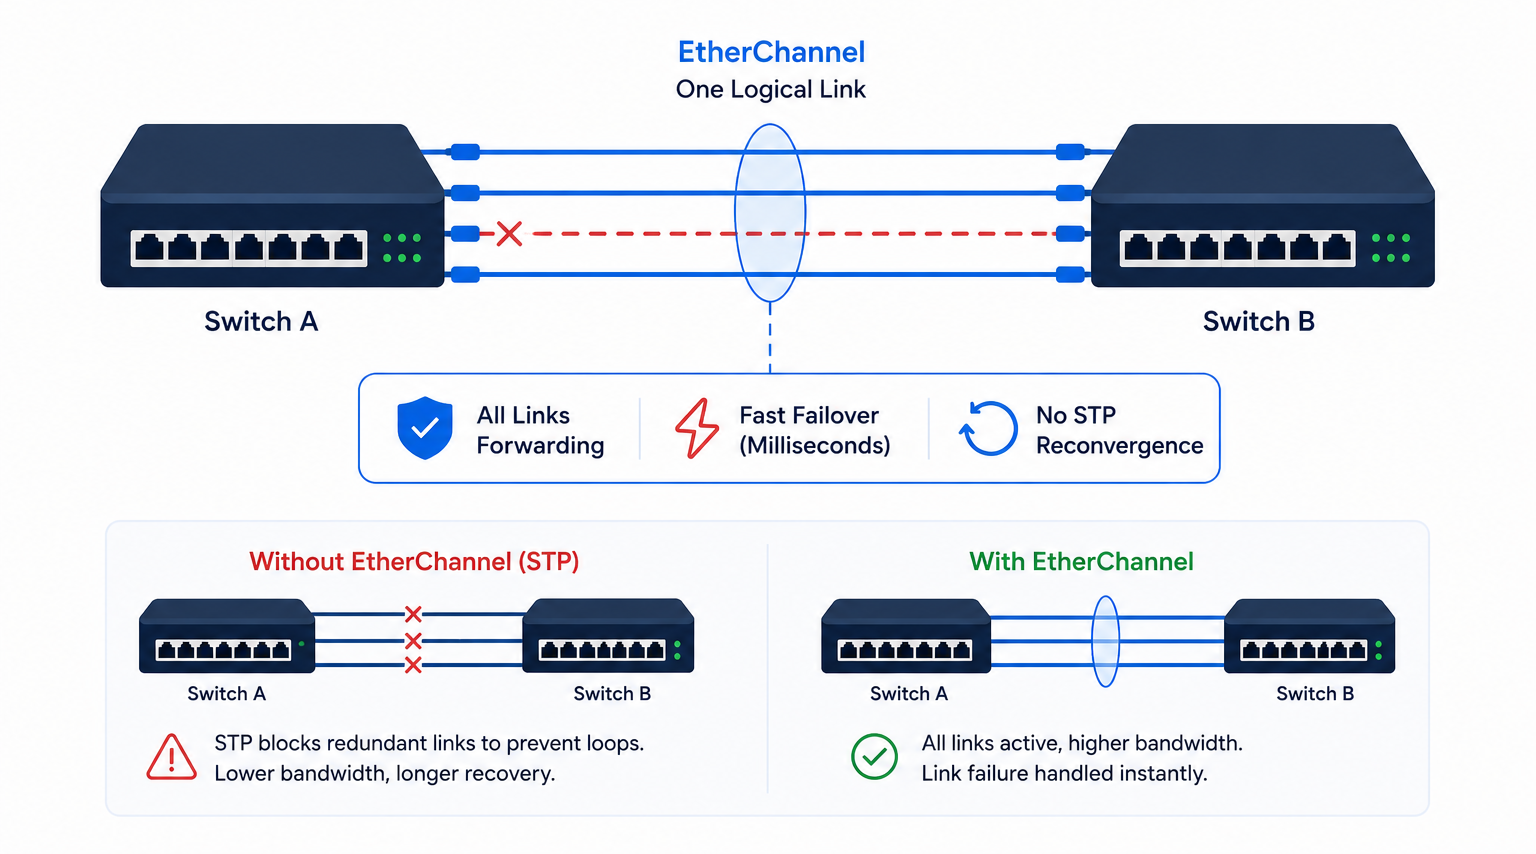
Redundant links are essential for uptime, but STP blocks them to stop loops. EtherChannel presents the bundle as one logical interface, so STP sees no loop and leaves all member links forwarding. If one cable fails, traffic shifts to the remaining links in milliseconds without any STP reconvergence.
3. Load Balancing Across Links
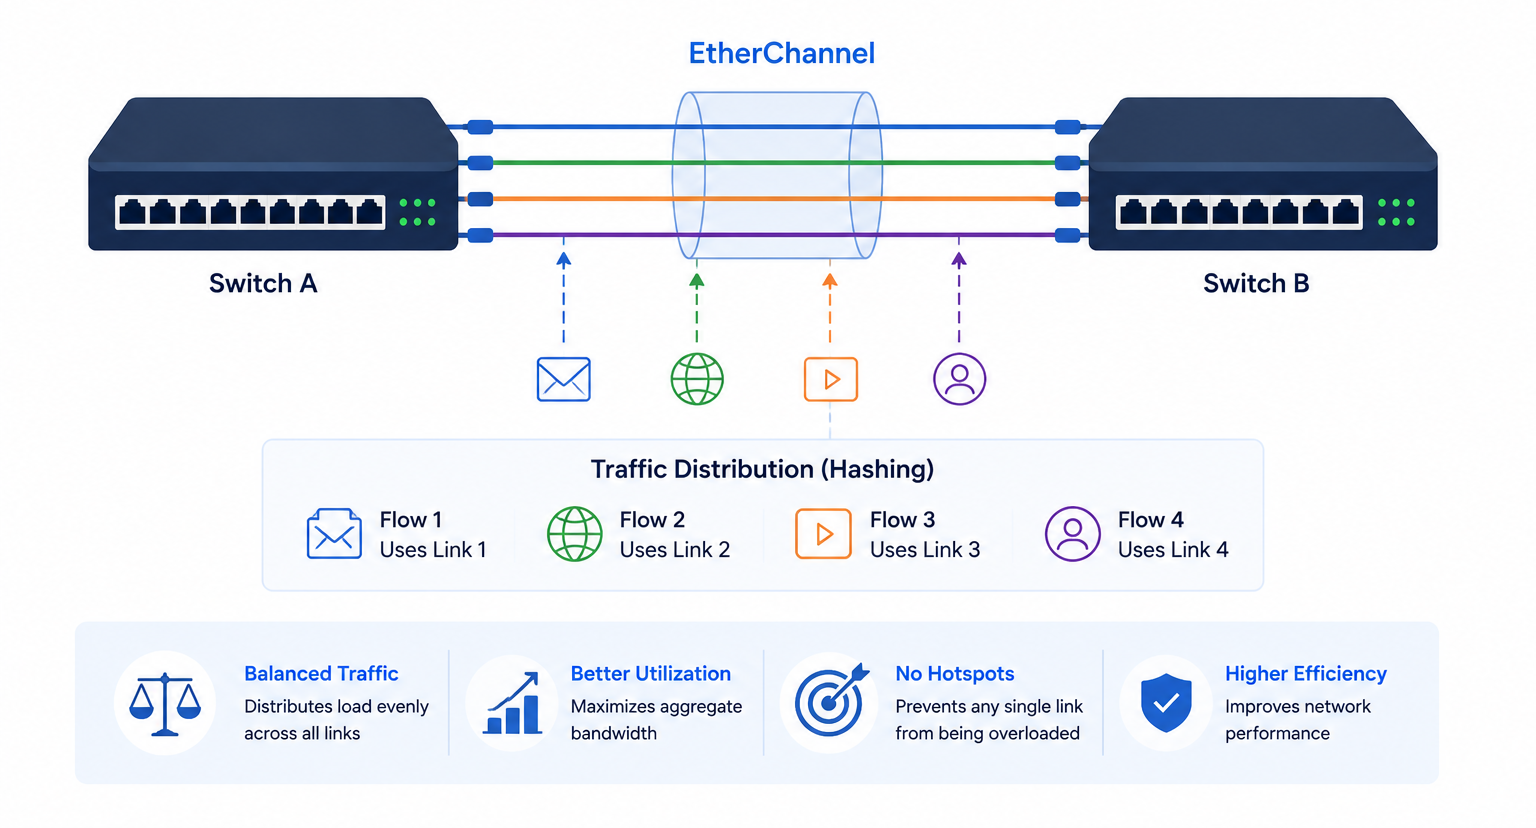
EtherChannel distributes traffic across member links using a hashing algorithm. You can tune this based on source MAC, destination MAC, source IP, destination IP, or a combination. This prevents any single link from becoming a hotspot while others sit idle.
EtherChannel Modes: On, LACP, and PAgP Explained
Cisco gives you three ways to form an EtherChannel. Each uses a different negotiation approach, and picking the wrong combination breaks the bundle.
| Mode | Protocol | What It Does |
|---|---|---|
| On | Static / None | Forces the channel on with zero negotiation. Both ends must use on. |
| Active | LACP | Actively sends LACP packets to negotiate the channel. |
| Passive | LACP | Listens for LACP packets and responds, but does not initiate. |
| Desirable | PAgP | Actively sends PAgP packets to negotiate the channel. |
| Auto | PAgP | Listens for PAgP packets and responds, but does not initiate. |
The “On” Mode (Static)
The on mode forces EtherChannel without any protocol negotiation. You configure both ends identically, and the switch bundles the ports immediately. This works, but it is risky. If one side is misconfigured, you can end up with a one-sided bundle that drops traffic or creates a loop. Most engineers avoid on in production and prefer a negotiation protocol that validates the partner.
LACP: The Open Standard
LACP follows the IEEE 802.3ad standard (now superseded by IEEE 802.1AX). Because it is an open protocol, LACP works between Cisco switches and devices from Juniper, HP, Dell, Windows Servers, Linux hosts, and virtually any modern network gear.
- Active mode: The port sends LACP data units (LACPDUs) every second and tries to form a channel.
- Passive mode: The port waits for an LACPDU from the other side. If it receives one, it responds and forms the channel.
Critical rule: If both ends are Passive, nothing happens. At least one side must be Active.
PAgP: Cisco Proprietary
PAgP predates LACP and works only between Cisco devices (or licensed third-party gear). It operates similarly but uses Cisco-specific packets.
- Desirable mode: The port actively sends PAgP packets to form a channel.
- Auto mode: The port waits for a PAgP packet from the other side.
Critical rule: If both ends are Auto, nothing happens. At least one side must be Desirable.
Compatibility Matrix
Here is what actually works when you mix modes on opposite ends of a link:
PAgP Compatibility:
| On | Auto | Desirable | |
|---|---|---|---|
| On | YES | NO | NO |
| Auto | NO | NO | YES |
| Desirable | NO | YES | YES |
LACP Compatibility:
| On | Passive | Active | |
|---|---|---|---|
| On | YES | NO | NO |
| Passive | NO | NO | YES |
| Active | NO | YES | YES |
Notice that On only works with On. You cannot mix On with any negotiated mode. Also, Active/Active works fine for LACP, and Desirable/Desirable works fine for PAgP. The only forbidden pairs are Passive/Passive and Auto/Auto.
LACP vs PAgP: Which One Should You Pick?
The choice usually comes down to your environment.
| Factor | LACP | PAgP |
|---|---|---|
| Standard | IEEE 802.3ad / 802.1AX | Cisco proprietary |
| Vendor support | Universal (Cisco, Juniper, HP, Dell, etc.) | Cisco-only |
| Max links | Up to 16 (8 active + 8 standby) | Up to 8 active |
| Cross-stack | Supported | Not supported |
| Best for | Mixed-vendor networks, data centers, modern deployments | Legacy Cisco-only sites, VSS setups |
My recommendation: Default to LACP unless you have a specific reason to use PAgP. LACP gives you flexibility, supports standby links, and works with non-Cisco gear. PAgP still has a place in older Catalyst deployments and Cisco Virtual Switching System (VSS) configurations, but LACP is the industry standard for new builds.
Prerequisites Before You Configure
EtherChannel is forgiving, but it will not form if the member ports disagree on settings. Before you bundle interfaces, verify these parameters match across every port in the group:
- Speed (e.g., all 1 Gbps or all 10 Gbps)
- Duplex (all full-duplex)
- Switchport mode (all access or all trunk)
- Native VLAN (for trunk ports)
- Allowed VLANs (for trunk ports)
- Trunk encapsulation (all dot1q)
- No individual port security or private VLAN settings
If any of these differ, the switch rejects the port from the bundle. You will see error messages or the port will sit in a suspended state.
Step-by-Step Configuration Guide
Let us configure EtherChannel between two Cisco switches. I will show you three scenarios: static On, LACP, and PAgP.
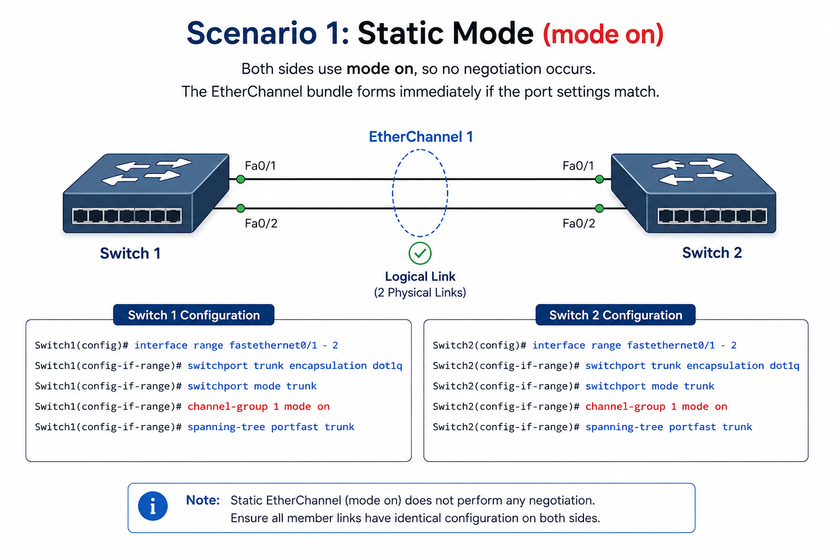
Scenario 1: Static Mode (Not Recommended for Production)
Switch 1:
Switch1(config)# interface range fastethernet0/1 - 2
Switch1(config-if-range)# switchport trunk encapsulation dot1q
Switch1(config-if-range)# switchport mode trunk
Switch1(config-if-range)# channel-group 1 mode on
Switch1(config-if-range)# spanning-tree portfast trunk
Switch 2:
Switch2(config)# interface range fastethernet0/1 - 2
Switch2(config-if-range)# switchport trunk encapsulation dot1q
Switch2(config-if-range)# switchport mode trunk
Switch2(config-if-range)# channel-group 1 mode on
Switch2(config-if-range)# spanning-tree portfast trunk
Both sides use mode on, so no negotiation occurs. The bundle forms immediately if the port settings match.
Scenario 2: LACP Active/Passive (Recommended)
This is the setup you will use in most real-world deployments. Switch 1 takes the active role, and Switch 2 responds passively.
Switch 1 (Active):
Switch1(config)# interface range gigabitethernet1/0/1 - 2
Switch1(config-if-range)# description LACP-Uplink-to-Switch2
Switch1(config-if-range)# switchport trunk encapsulation dot1q
Switch1(config-if-range)# switchport mode trunk
Switch1(config-if-range)# switchport trunk native vlan 99
Switch1(config-if-range)# switchport trunk allowed vlan 10,20,30,99
Switch1(config-if-range)# channel-group 1 mode active
Switch1(config-if-range)# no shutdown
Switch 2 (Passive):
Switch2(config)# interface range gigabitethernet1/0/1 - 2
Switch2(config-if-range)# description LACP-Uplink-to-Switch1
Switch2(config-if-range)# switchport trunk encapsulation dot1q
Switch2(config-if-range)# switchport mode trunk
Switch2(config-if-range)# switchport trunk native vlan 99
Switch2(config-if-range)# switchport trunk allowed vlan 10,20,30,99
Switch2(config-if-range)# channel-group 1 mode passive
Switch2(config-if-range)# no shutdown
Why put the distribution or core switch in active mode? Because that switch is less likely to change. The access switch can stay passive and simply respond. If you ever replace the access switch, the core keeps sending LACPDUs and the new switch joins the bundle automatically.
Scenario 3: PAgP Desirable/Auto (Cisco-Only)
Use this only when both devices are Cisco and you have a reason to prefer PAgP.
Switch 1 (Desirable):
Switch1(config)# interface range fastethernet0/1 - 2
Switch1(config-if-range)# switchport trunk encapsulation dot1q
Switch1(config-if-range)# switchport mode trunk
Switch1(config-if-range)# channel-group 1 mode desirable
Switch 2 (Auto):
Switch2(config)# interface range fastethernet0/1 - 2
Switch2(config-if-range)# switchport trunk encapsulation dot1q
Switch2(config-if-range)# switchport mode trunk
Switch2(config-if-range)# channel-group 1 mode auto
Configuring EtherChannel on a Windows Server
Modern Windows Servers support LACP natively through NIC teaming. Here is how you set it up from PowerShell:
# Create a new NIC team with LACP
New-NetLbfoTeam -Name "Team1" -TeamMembers "Ethernet","Ethernet 2","Ethernet 3" -TeamingMode LACP -LoadBalancingAlgorithm Dynamic

# Verify the team status
Get-NetLbfoTeam

# Check team member status
Get-NetLbfoTeamMember
The server must have at least one NIC set to active negotiation, and the switch port connected to it should use channel-group X mode active. Windows Server NIC teaming with LACP follows the same rules: at least one side must initiate.
Verifying Your EtherChannel Setup
Never assume the bundle formed correctly. Always verify with these commands.
Quick Status Check
Switch1# show etherchannel summaryLook for the port channel state. SU means the bundle is up and in use. P next to a port means it is bundled and forwarding.
Example output:
Flags:  D - down        P - bundled in port-channel
        I - stand-alone s - suspended
        H - Hot-standby (LACP only)
        R - Layer3      S - Layer2
        U - in use      f - failed to allocate aggregator

Group Port-channel  Protocol    Ports
------+-------------+-----------+-------------------------------
1      Po1(SU)       LACP        Gi1/0/1(P)  Gi1/0/2(P)
Detailed Port-Channel Information
Switch1# show etherchannel 1 detailThis shows the protocol type, neighbor details, age of the bundle, and any errors.
Interface-Level Verification
Switch1# show interfaces port-channel 1
Switch1# show ip interface brief
These commands confirm the port channel is administratively up and has an IP address if you configured it for Layer 3.
Physical Port Status
Switch1# show interfaces statusVerify that each physical member shows connected and matches speed and duplex settings.
Load Balancing: How Traffic Actually Flows
EtherChannel does not split a single packet across multiple links. Instead, it assigns each flow to one link based on a hash. You can control the hashing method globally on the switch.
View Current Load-Balance Method
Switch1# show etherchannel load-balanceChange the Load-Balance Method
Switch1(config)# port-channel load-balance src-dst-ipAvailable methods vary by platform but typically include:
| Method | Best For |
|---|---|
src-mac | Traffic from many hosts to few destinations |
dst-mac | Traffic from few hosts to many destinations |
src-dst-mac | General Layer 2 balancing |
src-ip | Traffic from many subnets |
dst-ip | Traffic to many subnets |
src-dst-ip | General Layer 3 balancing (most common) |
src-dst-port | Fine-grained TCP/UDP flow balancing |
Pro tip: For IP-based networks, src-dst-ip usually gives the most even distribution. If you run a data center with many VMs, consider src-dst-port for better granularity.
Common Misconfigurations and How to Fix Them
Even experienced engineers trip over these issues. Here is what to watch for.
1. Mismatched Port Settings
If speed, duplex, native VLAN, or allowed VLANs differ across member ports, the switch suspends the offending port from the bundle.
Fix: Run show interfaces status and show interfaces trunk to spot mismatches. Reconcile settings before adding ports to the channel group.
2. Both Sides Set to Passive or Auto
A LACP Passive port will not talk to another Passive port. A PAgP Auto port will not talk to another Auto port. The bundle simply never forms.
Fix: Set at least one side to Active (LACP) or Desirable (PAgP).
3. Mixing LACP and PAgP
You cannot negotiate a channel if one side speaks LACP and the other speaks PAgP. They are mutually exclusive.
Fix: Pick one protocol and configure both sides identically.
4. Using “On” with a Negotiated Mode
mode on does not send or listen for protocol packets. If the other side expects LACP or PAgP, the bundle fails.
Fix: Use mode on only when both sides use mode on.
5. Forgetting to Allow VLANs on Trunk Members
If you configure allowed VLANs on the physical ports but not the port channel, or vice versa, traffic for excluded VLANs gets dropped.
Fix: Apply trunk settings consistently to both the physical interfaces and the port-channel interface.
6. STP Still Blocking the Port Channel
Sometimes STP blocks the entire port channel because of a topology loop elsewhere, not because of EtherChannel itself.
Fix: Run show spanning-tree and verify the port channel is in a forwarding state. Check for redundant paths outside the bundle.
Conclusion
EtherChannel is one of those technologies that every network engineer should master. It solves bandwidth limits, adds redundancy, and keeps Spanning Tree from wasting your expensive fiber runs. The key takeaways are simple:
- Use LACP as your default protocol. It is the open standard, works across vendors, and supports up to 16 links with standby redundancy.
- Match speed, duplex, VLANs, and trunk settings across every member port before you bundle them.
- Set at least one side to Active (LACP) or Desirable (PAgP). Two passive or two auto ports will never form a channel.
- Verify everything with
show etherchannel summarybefore you call the job done. - Tune your load-balancing method to match your traffic patterns, especially in high-throughput environments.
If you are connecting to Windows Servers, Linux hosts, or non-Cisco switches, LACP is your only practical choice. For pure Cisco environments with older Catalyst gear or VSS deployments, PAgP still has a role, but even Cisco recommends LACP for new designs.
Want more articles and tutorials like this?
Get new tutorials, security alerts, and IT tips straight to your inbox.
That’s a really helpful overview; I’ve struggled with Spanning Tree and EtherChannel configurations before – thanks for outlining the process so clearly.