What Is a TACACS+ Server and How to Configure It: A Complete Guide
Managing access to dozens of network devices without a centralized system creates security gaps and operational headaches. Every switch, router, and firewall ends up with its own local user database, making password rotations a nightmare and audit trails nearly impossible. This post breaks down what a TACACS+ server does, why it matters for network security, and how you can build and configure one from scratch. Whether you run a small lab or a production enterprise network, you will walk away with working configurations you can deploy today.
Table of Contents
- What Is TACACS+ and Why Does It Matter?
- How TACACS+ Works Under the Hood
- TACACS+ vs RADIUS: Which One Fits Your Network?
- Building Your Own TACACS+ Server on Linux
- Configuring Users, Groups, and Command Authorization
- Setting Up Cisco IOS Devices as TACACS+ Clients
- Enabling Accounting for Full Audit Trails
- Testing Your TACACS+ Deployment
- Troubleshooting Common TACACS+ Issues
- Best Practices for Production TACACS+ Deployments
- Conclusion
What Is TACACS+ and Why Does It Matter?
TACACS+ stands for Terminal Access Controller Access-Control System Plus. Cisco developed this protocol to give network engineers a secure, centralized way to manage who can log into infrastructure devices and what they can do after they get in.
Unlike local user accounts that live on each router or switch, TACACS+ stores credentials and policies on a dedicated server. When someone tries to access a device, that device forwards the login request to the TACACS+ server instead of checking its own local database. The server decides whether to allow or deny access based on the rules you define.
This approach solves several real-world problems. First, it eliminates password sprawl across hundreds of devices. Second, it creates a single point of control for access policies. Third, it generates detailed logs showing exactly who logged in, when they logged in, and what commands they ran. For compliance teams, this audit trail proves invaluable during security reviews.
TACACS+ handles three distinct functions that together form the AAA framework:
- Authentication verifies the user’s identity through username and password checks, challenge-response dialogs, or multi-factor tokens.
- Authorization determines what resources, commands, and privilege levels the authenticated user can access during their session.
- Accounting records user activity including login times, executed commands, session duration, and data transferred.
The protocol encrypts the entire packet payload using a shared secret key, not just the password field. This full-packet encryption protects usernames, command strings, and authorization responses from anyone sniffing traffic on the wire. TACACS+ also separates authentication, authorization, and accounting into independent processes, giving you granular control over each stage.
How TACACS+ Works Under the Hood
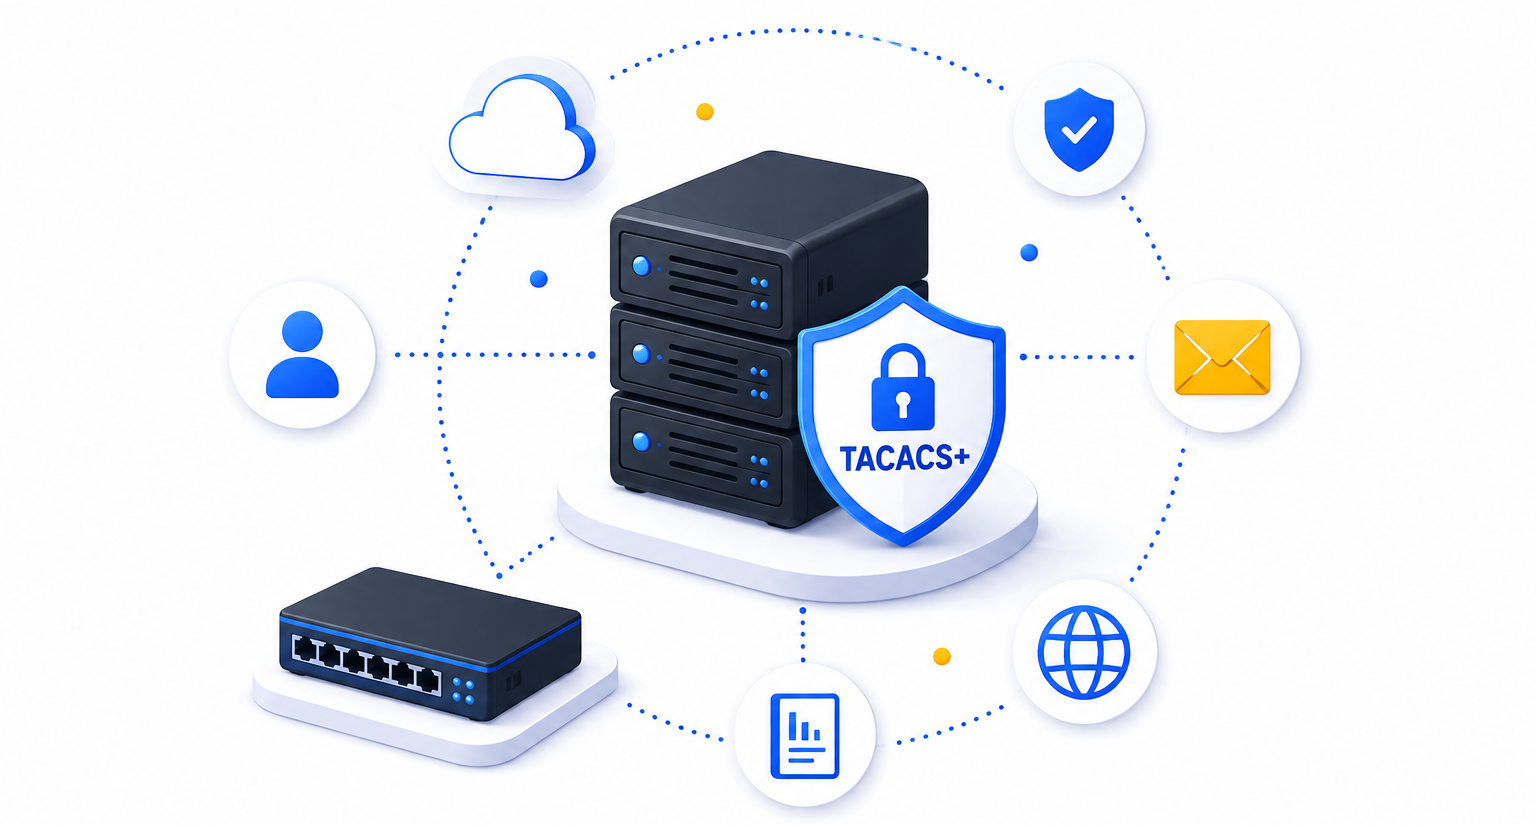
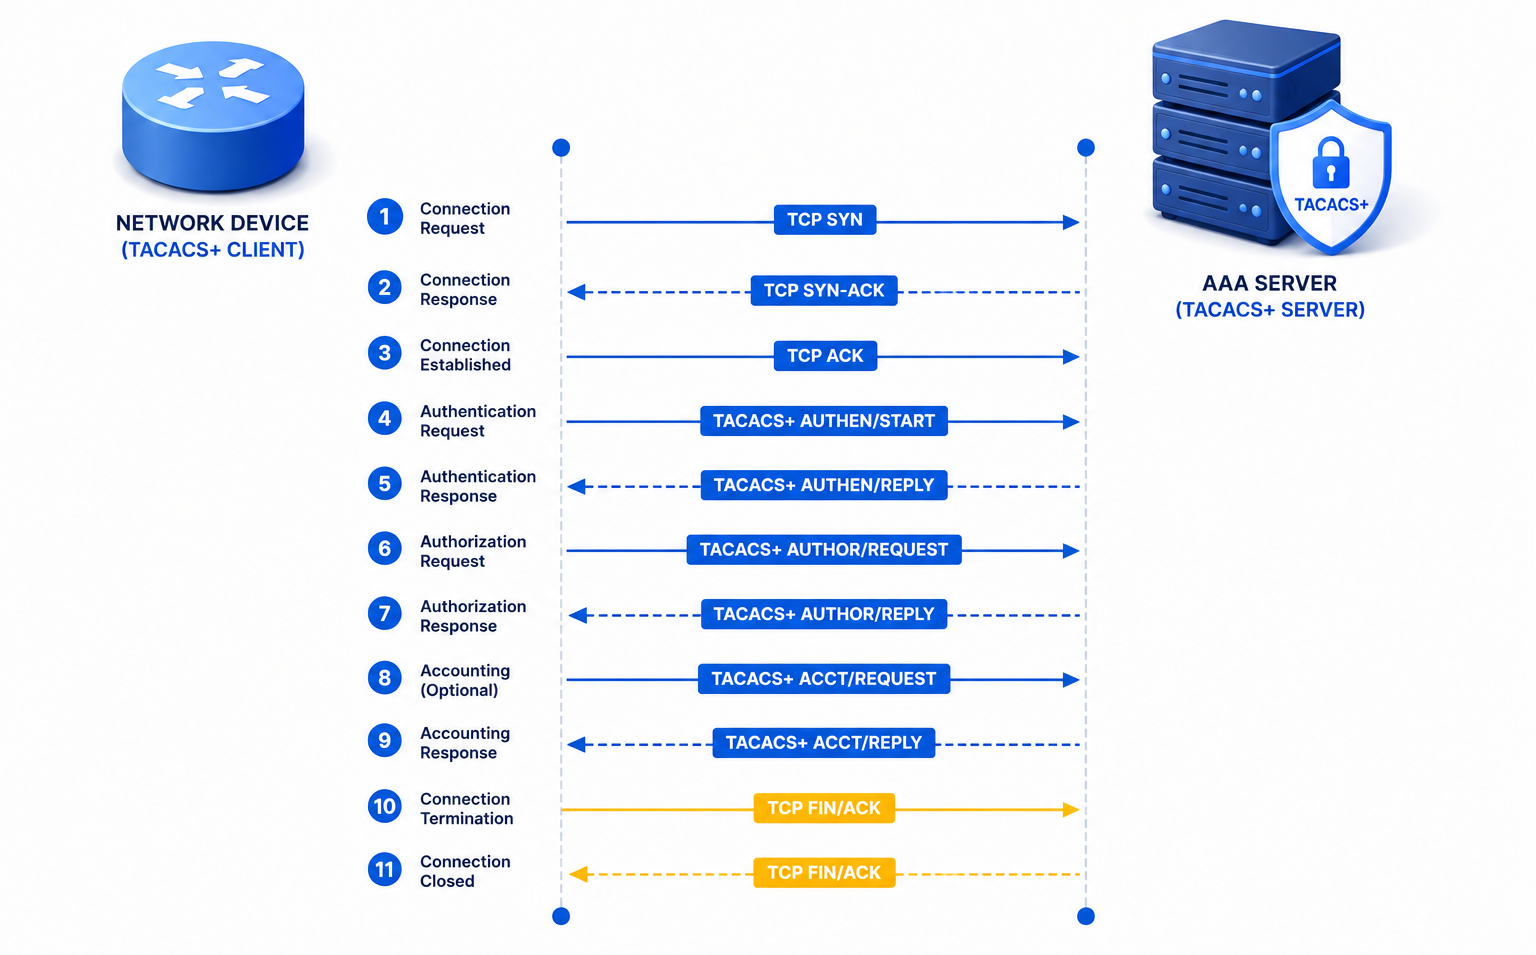
TACACS+ operates on a client-server model. The network device acts as the client, and the TACACS+ daemon runs on a central server. Communication happens over TCP port 49, which gives TACACS+ reliable delivery with built-in error correction and flow control.
When a user attempts to log into a network device, the device opens a TCP connection to the TACACS+ server and sends an authentication request. The server responds with either an access-accept or access-reject message. If authentication succeeds, the device then sends separate authorization requests for each action the user attempts, such as entering privileged EXEC mode or running configuration commands.
This separation matters because it allows the server to make real-time decisions about user permissions. For example, you can allow a junior engineer to run show commands but block them from interface configuration or routing protocol changes. The device checks with the server before executing each sensitive command.
The accounting process runs in parallel. The device sends start records when sessions begin and stop records when they end. For command accounting, the device logs each executed command along with the privilege level, timestamp, and username. All this data lands on the TACACS+ server where you can analyze it for security audits or troubleshooting.
TACACS+ vs RADIUS: Which One Fits Your Network?
Network engineers often debate whether to deploy TACACS+ or RADIUS for AAA services. Both protocols centralize authentication, but they serve different primary purposes and exhibit distinct technical behaviors.
RADIUS focuses on network access authentication. Internet service providers, wireless networks, and VPN concentrators commonly use it to authenticate end users who need network connectivity. RADIUS combines authentication and authorization into a single process and encrypts only the password field, leaving usernames and other attributes in plaintext. It runs over UDP ports 1812 and 1813, which offers lower latency but no delivery guarantee.
TACACS+ targets device administration. It gives you command-level control over what administrators can do on routers, switches, and firewalls. It encrypts the entire packet, separates AAA into distinct processes, and uses TCP port 49 for reliable transport.
Here is a quick comparison to help you decide:
| Feature | RADIUS | TACACS+ |
|---|---|---|
| Transport Protocol | UDP | TCP |
| Encryption Scope | Passwords only | Full packet |
| AAA Separation | Combined | Independent |
| Authorization Granularity | Basic AV pairs | Per-command |
| Primary Use Case | End-user access | Device admin |
| Vendor Support | Universal | Cisco + broader |
Many organizations run both protocols simultaneously. They use RADIUS for Wi-Fi and VPN authentication while relying on TACACS+ for switch and router administration. This hybrid approach leverages each protocol’s strengths without forcing an either-or decision.
Building Your Own TACACS+ Server on Linux
You have several options for deploying a TACACS+ server. Commercial solutions like Cisco ISE offer polished web interfaces and deep integration. For budget-conscious teams or lab environments, open-source tac_plus delivers full TACACS+ functionality on Linux without licensing costs.
Option 1: Installing tac_plus on Ubuntu or Debian
Open a terminal on your Linux server and update the package list. Then install the TACACS+ server package directly from the repositories.
sudo apt-get update
sudo apt-get install tacacs+
The installation creates the configuration file at /etc/tacacs+/tac_plus.conf and starts the tacacs_plus service automatically.
Option 2: Installing tac_plus on CentOS or RHEL
CentOS requires an additional repository because tac_plus does not ship with the base repositories. Create a new repository file first.
cd /etc/yum.repos.d/
sudo vim nux-misc.repo
Add these lines to the file:
[nux-misc]
name=Nux Misc
baseurl=http://li.nux.ro/download/nux/misc/el7/x86_64/
enabled=0
gpgcheck=1
gpgkey=http://li.nux.ro/download/nux/RPM-GPG-KEY-nux.ro
Save the file and install tac_plus:
sudo yum --enablerepo=nux-misc install tac_plusOption 3: Windows Deployment with TACACS.net
If your environment runs Windows Server, TACACS.net provides a native TACACS+ implementation with a graphical management console. Download the installer from tacacs.net, run the setup wizard, and configure clients through the GUI. The tool supports multi-factor authentication through Google Authenticator and offers enhanced logging features for compliance reporting.
Configuring Users, Groups, and Command Authorization
Once you install the TACACS+ server, you need to edit the configuration file to define your shared secret, client devices, user groups, and individual users. The configuration syntax follows a straightforward block structure.
Step 1: Set the Shared Secret
The shared secret encrypts communication between the TACACS+ server and your network devices. Open the configuration file:
sudo vim /etc/tacacs+/tac_plus.confFind the key line and replace the default value with a strong secret:
key = "YourStrongSecretKey2026!"Every network device that talks to this server must use the exact same key.
Step 2: Define Client Access Controls
Create an access control list that specifies which IP addresses or subnets can act as TACACS+ clients. Use regular expressions for flexibility.
acl = default {
    permit = 192\.168\.1\.
    permit = 10\.0\.0\.
    deny = .*
}
This example permits any device in 192.168.1.0/24 or 10.0.0.0/24 and denies everything else.
Step 3: Create User Groups
Groups simplify permission management. Instead of assigning commands to every individual user, you assign users to groups and define group-level policies.
group = netadmin {
    default service = permit
    login = file /etc/passwd
    service = exec {
        priv-lvl = 15
    }
    cmd = show {
        permit .*
    }
    cmd = configure {
        permit .*
    }
    cmd = interface {
        permit .*
    }
    cmd = no {
        permit shutdown
    }
}

group = helpdesk {
    default service = deny
    login = file /etc/passwd
    service = exec {
        priv-lvl = 1
    }
    cmd = show {
        permit version
        permit interfaces
        permit ip route
        permit running-config
    }
    cmd = exit {
        permit .*
    }
}
The netadmin group grants full privilege level 15 access and permits configuration changes. The helpdesk group restricts users to show commands only and denies all other operations.
Step 4: Add Individual Users
Create user entries and assign them to groups. You can authenticate users against the local passwd file, PAM, or encrypted passwords stored directly in the configuration.
user = john.doe {
    member = netadmin
    login = PAM
}

user = jane.smith {
    member = helpdesk
    login = des VFj4MGmISJNmE
}
For the encrypted password, generate the hash using the tac_pwd utility:
tac_pwd
Password to be encrypted: YourSecurePassword
Copy the output hash into the login field.
Step 5: Restart the Service
After saving the configuration file, restart the TACACS+ service to apply changes:
sudo systemctl restart tacacs_plusVerify the server listens on port 49:
sudo netstat -tulpen | grep tac_plus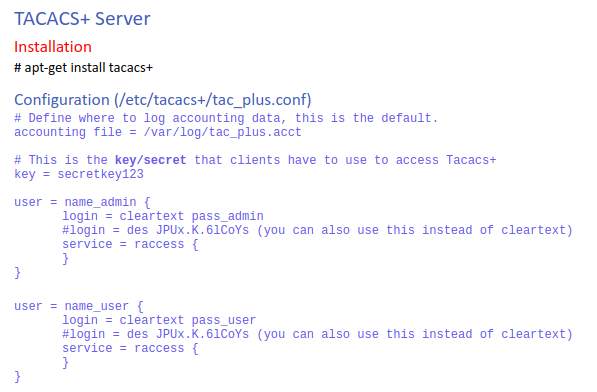
Setting Up Cisco IOS Devices as TACACS+ Clients
With the server ready, configure your network devices to use TACACS+ for AAA services. The following examples work on Cisco IOS and IOS-XE platforms.
Step 1: Define the TACACS+ Server
Enter global configuration mode and specify the TACACS+ server details:
configure terminal
tacacs server TACACS-PRIMARY
 address ipv4 192.168.1.10
 key 0 YourStrongSecretKey2026!
 timeout 5
exit
Step 2: Create a Server Group
Group your TACACS+ servers for easier management. You can add multiple servers for redundancy.
aaa group server tacacs+ TACACS-GROUP
 server name TACACS-PRIMARY
exit
Step 3: Enable AAA and Configure Authentication
Enable the AAA framework and define authentication method lists. The local keyword provides fallback if the TACACS+ server becomes unreachable.
aaa new-model
aaa authentication login default group TACACS-GROUP local
aaa authentication enable default group TACACS-GROUP enable
The first command enables AAA. The second command sets TACACS+ as the primary login authentication method with local fallback. The third command does the same for enable mode access.
Step 4: Configure Authorization
Authorization controls what users can do after they authenticate. These commands enforce TACACS+ authorization for EXEC shell access and privilege level 15 commands:
aaa authorization exec default group TACACS-GROUP local
aaa authorization commands 15 default group TACACS-GROUP local
Without authorization, authenticated users might gain unrestricted access regardless of their group policies on the server.
Step 5: Apply Authentication to VTY Lines
Configure your virtual terminal lines to use the default authentication method:
line vty 0 15
 login authentication default
 authorization exec default
 transport input ssh
For the console port, keep the default method but ensure you have a local fallback account in case the TACACS+ server fails:
line con 0
 login authentication default
Enabling Accounting for Full Audit Trails
Accounting completes the AAA triad by logging user activity. TACACS+ accounting records capture session starts, stops, and every command executed. This data proves essential for security investigations and compliance audits.
Step 1: Configure EXEC Accounting
Log when users start and end their sessions:
aaa accounting exec default start-stop group TACACS-GROUPStep 2: Configure Command Accounting
Record every command entered at privilege level 15:
aaa accounting commands 15 default start-stop group TACACS-GROUPStep 3: Configure Network Accounting
If your device supports network service accounting for protocols like PPP, add this line:
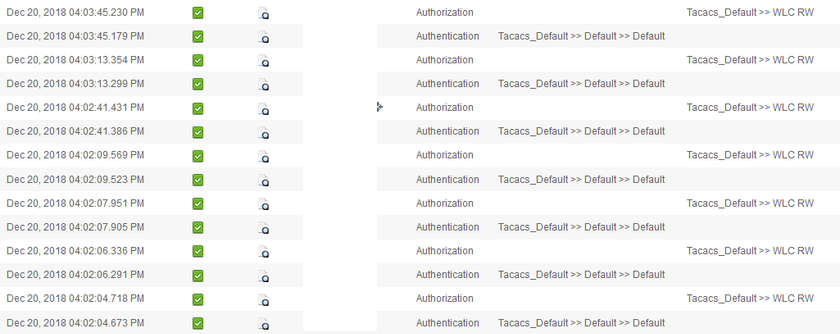
aaa accounting network default start-stop group TACACS-GROUPThe TACACS+ server stores accounting records with timestamps, usernames, terminal lines, and command strings. You can parse these logs with standard Linux tools or forward them to a SIEM platform for centralized analysis.
Testing Your TACACS+ Deployment
Before declaring your TACACS+ setup production-ready, run through these verification steps.
Test 1: Verify Server Connectivity
From your network device, test TCP connectivity to the TACACS+ server:
telnet 192.168.1.10 49If the connection fails, check firewalls, routing, and the server service status.
Test 2: Test Authentication with a Client Tool
On the Linux server, use the tacacs_client utility to simulate an authentication request:
tacacs_client -v -u john.doe -H 127.0.0.1 -k YourStrongSecretKey2026! authenticateEnter the password when prompted. A PASS status confirms the server works correctly.
Test 3: Log In from a Remote Device
Open an SSH session to your configured network device using a TACACS+ user account. Verify that:
- The login succeeds using TACACS+ credentials.
- The privilege level matches the group assignment.
- Show commands work for all users.
- Configuration commands fail for restricted users.
Test 4: Verify Fallback Behavior
Disconnect the TACACS+ server from the network or stop the service. Attempt to log in with your local fallback account. The device should accept the local credentials and grant access based on the local database.
Troubleshooting Common TACACS+ Issues
Even with careful configuration, problems arise. Here are the most common issues and their fixes.
Issue 1: Authentication Fails Despite Correct Credentials
Check that the shared secret matches exactly on both the server and the client. Even a trailing space breaks encryption. Verify the user exists on the server and belongs to the correct group. Check server logs at /var/log/syslog or /var/log/messages for detailed error messages.
Issue 2: Users Authenticate But Cannot Run Commands
Authorization usually causes this symptom. Confirm that aaa authorization commands is configured on the device. Verify the user group on the server permits the attempted commands. Remember that default service = deny blocks everything unless explicitly permitted.
Issue 3: TACACS+ Server Becomes Unreachable
Ensure your device has a local fallback configured. Without it, a server outage locks everyone out. Test connectivity with ping and telnet. Check that the tac_plus process runs with systemctl status tacacs_plus.
Issue 4: Accounting Records Missing
Verify that aaa accounting commands appears in the device configuration. Check that the TACACS+ server has disk space and write permissions for log files. Some platforms require command accounting specifically for privilege level 15.
Suggested Image: Title: “TACACS+ Troubleshooting Flowchart” | Alt tag: “Flowchart diagram showing troubleshooting steps for common TACACS+ authentication and authorization failures”
Best Practices for Production TACACS+ Deployments
Running TACACS+ in production demands more than a basic setup. Follow these guidelines to keep your AAA infrastructure secure and reliable.
Use Strong Shared Secrets: Generate secrets with at least 32 characters mixing uppercase, lowercase, numbers, and symbols. Rotate these secrets quarterly and store them in a password vault.
Deploy Redundant Servers: Configure at least two TACACS+ servers in different network segments. Use server groups on your devices so authentication falls back automatically if the primary server fails.
Enable Local Fallback Carefully: Local fallback prevents lockouts during server outages, but create dedicated emergency accounts with strong passwords. Avoid using common usernames like admin or root for fallback access.
Restrict TACACS+ Traffic: Apply access control lists on your management interfaces to limit TACACS+ traffic to authorized server IP addresses. Block port 49 from general network access.
Monitor and Alert: Set up log monitoring for failed authentication attempts. Multiple failures from the same source might indicate brute-force attacks. Forward accounting logs to a SIEM for correlation with other security events.
Separate Roles by Group: Create distinct groups for network administrators, security operators, and helpdesk staff. Apply the principle of least privilege so each role accesses only the commands needed for their job.
Regular Backups: Back up your tac_plus.conf file after every change. Version control your configuration files with Git so you can track changes and roll back quickly if needed.
Suggested Image: Title: “TACACS+ High Availability Setup” | Alt tag: “Network diagram showing redundant TACACS+ servers with failover paths to core switches and routers”
Conclusion
A TACACS+ server transforms how you manage access to network infrastructure. It centralizes authentication, enforces granular authorization, and creates comprehensive audit trails that local device accounts simply cannot match. By deploying tac_plus on Linux or TACACS.net on Windows, you gain enterprise-grade AAA capabilities without expensive licensing.
Start with a lab setup using the configurations in this guide. Test authentication, authorization, and accounting thoroughly before rolling to production. Keep your shared secrets strong, your server redundant, and your fallback accounts secure. With TACACS+ handling your device access, you will spend less time managing scattered local accounts and more time building a resilient network.
Want more articles and tutorials like this?
Get new tutorials, security alerts, and IT tips straight to your inbox.
That’s a really clear explanation, it makes so much more sense now how complex managing those individual device accounts can be. Thanks for the detailed guide.