How to Configure Squid Proxy on Linux: A Practical Guide for Beginners
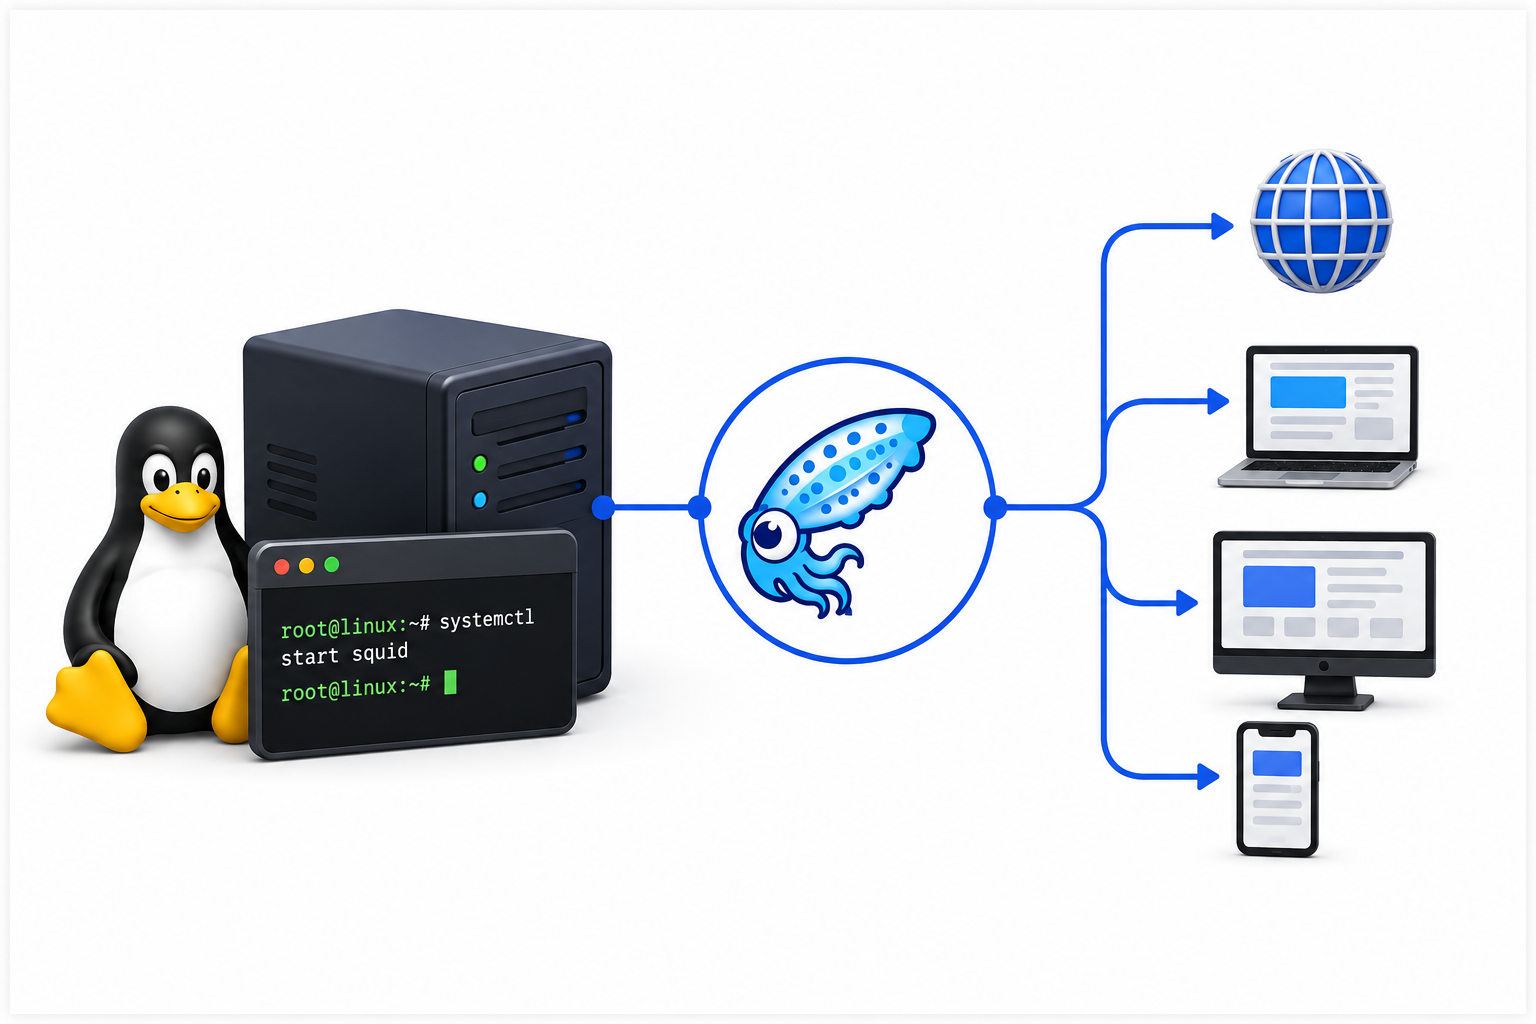
If you run a small office network or a home lab, you have probably wondered how to control internet access, block distracting sites, or cache frequently visited pages. Squid handles all of this from a single Linux box. In this guide, I will walk you through installing Squid, tuning its configuration file, setting up access rules, blocking websites, adding password protection, and even handling HTTPS traffic. Every command here has been tested on Debian-based systems, and I have added notes for Red Hat users where paths differ. Let us get your proxy up and running.
Table of Contents
- What Is Squid and Why Should You Use It?
- Installing Squid on Your Linux Server
- Understanding the Main Configuration File
- Setting the Listening Port
- Configuring Network Access with ACLs
- Blocking Unwanted Websites
- Adding User Authentication
- Handling HTTPS Traffic and SSL Bump
- Testing Your Proxy Setup
- Monitoring Logs and Troubleshooting
- Quick Performance Tips for Production
- Conclusion
What Is Squid and Why Should You Use It?
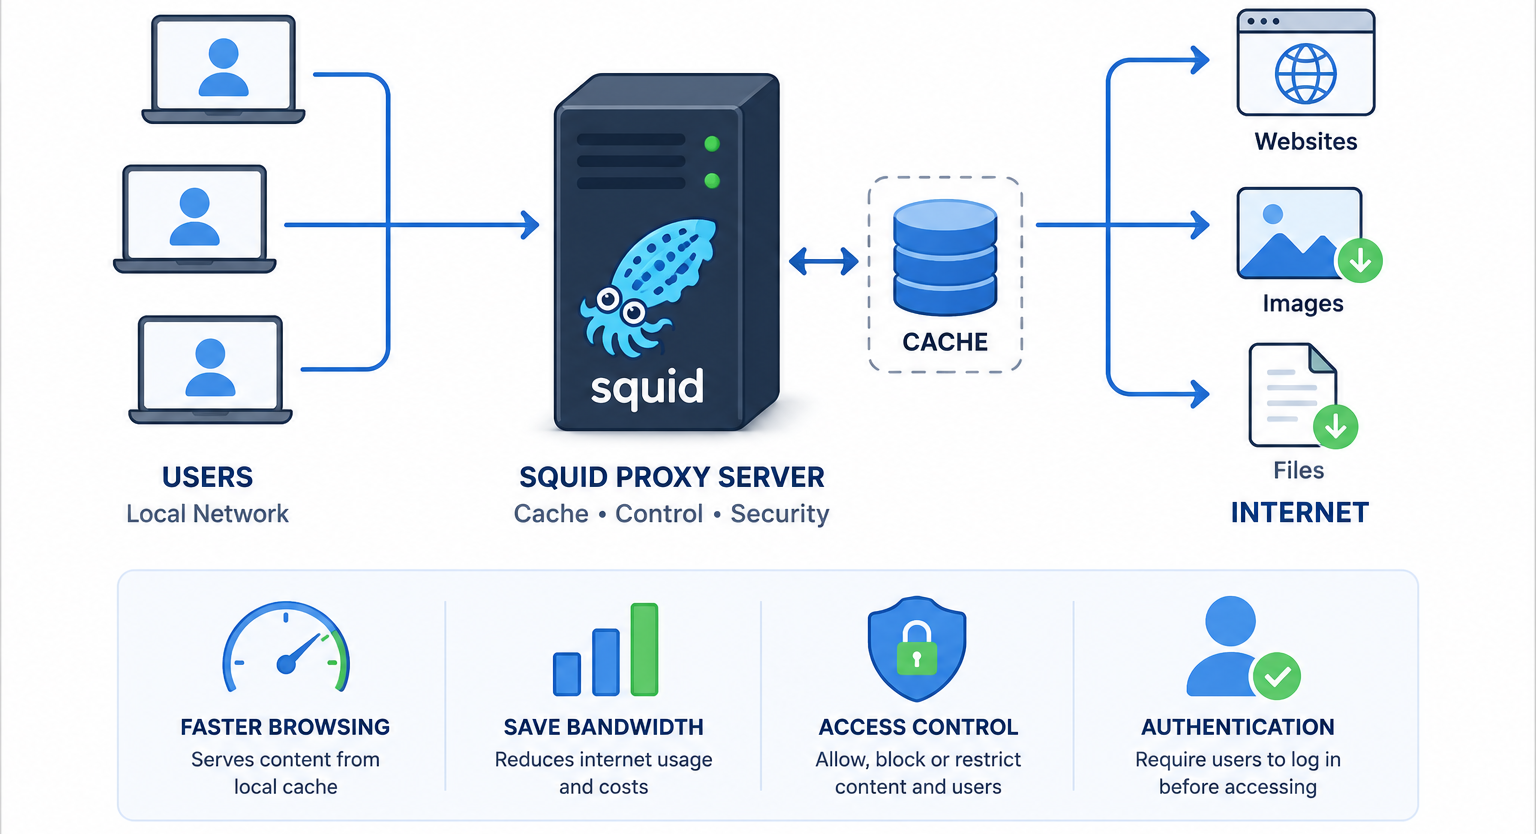
Squid is a caching proxy server for the web. It sits between your users and the internet, forwarding requests and storing copies of pages, images, and files. When someone asks for the same resource again, Squid serves it from its local cache instead of fetching it from the web. This cuts bandwidth usage and speeds up browsing.
Beyond caching, Squid gives you fine-grained control. You can allow only certain IP ranges, block social media during work hours, force users to log in with a password, and inspect encrypted HTTPS traffic in corporate environments. It runs on almost every Linux distribution and consumes modest resources, making it ideal for small networks and production gateways alike.
Installing Squid on Your Linux Server
Start with a fresh terminal. On Debian or Ubuntu, run:
sudo apt update
sudo apt install squid -y
On RHEL, CentOS, or AlmaLinux, use:
sudo yum install squid
# or
sudo dnf install squid
After installation, check that Squid is present:
squid -vNow start the service and make sure it launches on boot:
sudo systemctl start squid
sudo systemctl enable squid
You can stop, restart, or reload the service at any time:
sudo systemctl stop squid
sudo systemctl restart squid
sudo systemctl reload squid
The reload command is handy because it rereads the configuration file without dropping active connections. Use it whenever you edit squid.conf.
Understanding the Main Configuration File
Squid keeps its settings in /etc/squid/squid.conf. This file is long. On a fresh Ubuntu install, it often exceeds 7,000 lines because it ships with extensive comments and examples. You can count them if you are curious:
wc -l /etc/squid/squid.confBefore you change anything, back up the original:
sudo cp /etc/squid/squid.conf /etc/squid/squid.conf.backupWhen you open the file, you will see directives. Directives tell Squid what to do. The most common ones are:
acl— defines access control lists (who or what you are talking about).http_access— allows or denies traffic based on ACLs.http_port— sets the port Squid listens on.cache_dir— points to the disk cache location and size.
Rules in Squid follow a top-down order. The first matching http_access rule wins. That means you should place your most specific rules near the top and your catch-all deny rule at the bottom.
Setting the Listening Port
By default, Squid listens on port 3128. You can confirm this quickly:
grep ^http_port /etc/squid/squid.confIf you want to change it — perhaps to 8888 or 8080 — open the file:
sudo vim /etc/squid/squid.confFind the line:
http_port 3128Change it to your preferred port, for example:
http_port 8888Save and exit. Before you restart Squid, always check the file for syntax errors:
sudo squid -k parseIf you see Processing: OK, you are safe to reload:
sudo systemctl reload squidDo not skip the parse step. A single typo in squid.conf can stop the service from starting, and your users will lose internet access immediately.
Configuring Network Access with ACLs
ACLs are the heart of Squid. They let you group IP addresses, domains, ports, or time ranges and then decide who gets through.
Allow Your Local Network
Suppose your office subnet is 192.168.1.0/24. Add this ACL near the top of the file:
acl mynetwork src 192.168.1.0/24Then add the access rule. Place it above the final http_access deny all line:
http_access allow mynetwork
http_access allow localhost
http_access deny all
The localhost rule ensures the server itself can still reach the web for updates and testing. The last line blocks everyone else. This is your safety net.
If you have multiple subnets, list them:
acl mynetwork src 192.168.1.0/24
acl mynetwork src 10.0.0.0/8
acl mynetwork src 172.16.0.0/12
Restrict by Port
Squid also lets you control which remote ports clients may contact. Define safe ports like this:
acl Safe_ports port 80          # HTTP
acl Safe_ports port 443         # HTTPS
acl Safe_ports port 21          # FTP
acl Safe_ports port 70          # Gopher
Then deny access to anything else:
http_access deny !Safe_portsThe exclamation mark means “not.” So this line reads: deny any request that does not use a safe port.
Blocking Unwanted Websites
Blocking sites is straightforward with domain-based ACLs. First, create a text file that lists the domains you want to block:
sudo mkdir -p /etc/squid
sudo touch /etc/squid/blocked
Open the file and add domains, one per line:
.facebook.com
.instagram.com
.twitter.com
.tiktok.com
The leading dot is important. It blocks the domain plus all subdomains.
Now reference that file inside squid.conf:
acl blocklist dstdomain "/etc/squid/blocked"
http_access deny blocklist
Place the deny rule before your general allow rules. This way, blocked traffic gets dropped first. After saving, parse and reload:
sudo squid -k parse
sudo systemctl reload squid
You can also block by keyword if you prefer:
acl badwords url_regex -i gambling poker casino
http_access deny badwords
The -i flag makes the match case-insensitive.
Adding User Authentication
Sometimes IP-based rules are not enough. You may want every user to enter a username and password before browsing. Squid supports several authentication helpers. The easiest one uses Apache-style password files.
Install the Tools
sudo apt install apache2-utilsCreate the Password File
sudo htpasswd -c /etc/squid/squid_password linuxproxyserverThe -c flag creates the file. The command prompts you for a password twice. If you want to add more users later, omit -c so you do not overwrite the file:
sudo htpasswd /etc/squid/squid_password anotheruserTest the Helper
Before you update Squid, verify the helper works:
/usr/lib/squid/basic_ncsa_auth /etc/squid/squid_passwordType the username, a space, the password, and press Enter. If you see OK, the helper recognizes the user. Press Ctrl+C to exit.
Update squid.conf
Add these lines near the top of the file:
auth_param basic program /usr/lib/squid/basic_ncsa_auth /etc/squid/squid_password
auth_param basic realm Squid Proxy Caching Web Server
auth_param basic credentialsttl 2 hours

acl authenticated proxy_auth REQUIRED
Then change your access rules:
http_access allow authenticated mynetwork
http_access allow localhost
http_access deny all
This setup requires both authentication and membership in your local network. A valid user on an unknown network still gets blocked.
Test from a Client
Use curl to confirm everything works:
curl -x http://192.168.1.200:8888 \
  --proxy-user linuxproxyserver:123456 \
  -I https://instagram.com
If authentication fails, Squid returns a 407 Proxy Authentication Required error. Double-check the username, password, and path to the password file.
Handling HTTPS Traffic and SSL Bump
Modern web traffic is mostly HTTPS. Standard Squid can forward HTTPS requests, but it cannot read or filter the content inside the encrypted tunnel. If you need to inspect traffic — for example, to block malware downloads over HTTPS or enforce company policy — you can enable SSL bumping.
Warning: Only use SSL bumping in environments where you own the infrastructure and your users know inspection is happening. It is a man-in-the-middle technique and raises serious privacy concerns if deployed secretly.
Generate a Self-Signed CA Certificate
Squid needs a certificate authority to sign dynamic certificates for visited sites. Create the directory and generate the key pair:
sudo mkdir -p /etc/squid/ssl
cd /etc/squid/ssl

sudo openssl req -new -newkey rsa:2048 -days 365 -nodes -x509 \
  -keyout squid-ca.key -out squid-ca.crt \
  -subj "/C=US/ST=State/L=City/O=MyCompany/CN=Squid Proxy CA"

sudo cat squid-ca.key squid-ca.crt > squid-ca.pem
sudo openssl dhparam -outform PEM -out dhparam.pem 2048

sudo chown -R proxy:proxy /etc/squid/ssl
sudo chmod 600 /etc/squid/ssl/*
Configure SSL Bump in squid.conf
Add a new HTTPS port with SSL bump enabled:
https_port 3130 intercept ssl-bump \
  generate-host-certificates=on \
  dynamic_cert_mem_cache_size=4MB \
  cert=/etc/squid/ssl/squid-ca.pem
Then define the bump steps:
acl step1 at_step SslBump1
acl step2 at_step SslBump2
acl step3 at_step SslBump3

ssl_bump peek step1
ssl_bump stare step2
ssl_bump bump step3
Initialize the SSL certificate database:
sudo /usr/lib/squid/security_file_certgen -c -s /var/lib/squid/ssl_db -M 4MB
sudo chown -R proxy:proxy /var/lib/squid/ssl_db
Deploy the CA to Clients
Every client browser or operating system must trust your squid-ca.crt file. Import it into the system certificate store or browser trust settings. Without this step, users will see security warnings on every HTTPS site.
Testing Your Proxy Setup
Never push a proxy live without testing. Here are the most useful checks.
Validate Configuration Syntax
sudo squid -k parseIf Squid reports errors, the line number usually points you right to the problem.
Check the Service Status
sudo systemctl status squidLook for active (running) in the output.
Verify the Listening Port
ss -tlnp | grep squidYou should see your http_port and any https_port you configured.
Test a Simple HTTP Request
From another machine on the allowed network:
curl -x http://192.168.1.200:8888 -I http://example.comIf authentication is enabled, add the credentials:
curl -x http://192.168.1.200:8888 \
  --proxy-user linuxproxyserver:123456 \
  -I http://example.com
A successful test returns HTTP headers with a 200 OK status.
Monitoring Logs and Troubleshooting
Squid writes two main log files:
/var/log/squid/access.log— records every request, client IP, URL, and result code./var/log/squid/cache.log— records startup messages, errors, and debugging info.
Watch live traffic:
sudo tail -f /var/log/squid/access.logFilter by a specific IP:
sudo grep "192.168.1.50" /var/log/squid/access.logCommon Issues and Fixes
Squid fails to start after editing squid.conf: Run sudo squid -k parse. Fix the reported line, then restart.
Clients get “Access Denied”: Check that their IP falls inside your ACL subnet and that your http_access rules are in the correct order.
Authentication keeps failing: Verify the password file path, ensure the basic_ncsa_auth helper exists at the listed path (it varies by distribution), and check file permissions. The Squid user must read the password file.
HTTPS sites show certificate errors: This means SSL bumping is active but the client does not trust your CA. Install squid-ca.crt on the client device.
Quick Performance Tips for Production
Once your proxy works, a few tweaks make it faster and more stable.
Increase Memory Cache
If your server has spare RAM, raise the memory cache limit:
cache_mem 512 MB
memory_replacement_policy lru
Set Up Disk Caching
cache_dir ufs /var/spool/squid 10000 16 256This creates a 10 GB cache with 16 top-level directories and 256 subdirectories. After changing this, initialize the cache:
sudo systemctl stop squid
sudo squid -z
sudo systemctl start squid
Tune Refresh Patterns
Cache static assets longer than dynamic pages:
refresh_pattern -i \.(gif|png|jpg|jpeg|ico)$ 10080 90% 43200
refresh_pattern -i \.(css|js)$ 10080 90% 43200
refresh_pattern -i (/cgi-bin/|\?) 0 0% 0
refresh_pattern . 0 20% 4320
Hide Proxy Headers
For security, suppress version strings and remove headers that leak internal details:
httpd_suppress_version_string on
via off
forwarded_for delete
reply_header_access X-Cache deny all
reply_header_access X-Cache-Lookup deny all
Enable Buffered Logs
On busy proxies, constant disk writes hurt performance. Turn on log buffering:
buffered_logs onSuggested Images
Below are image ideas you can create or source for this post. Each includes a title and alt tag for SEO.
| Title | Alt Tag |
|---|---|
| Squid Proxy Network Diagram | Diagram showing a Linux Squid proxy server sitting between a local office network and the public internet with arrows for HTTP and HTTPS traffic |
| Squid Configuration File Screenshot | Screenshot of a terminal showing the vim editor open on the squid.conf file with syntax highlighting for ACL rules |
| Proxy Authentication Login Prompt | Browser screenshot displaying the Squid Proxy Caching Web Server authentication dialog asking for username and password |
| SSL Certificate Warning Example | Browser security warning page caused by an untrusted Squid proxy CA certificate before client installation |
| Squid Access Log Terminal Output | Terminal window showing live tail output of the Squid access.log file with color-coded HTTP status codes |
Conclusion
Squid turns an ordinary Linux server into a powerful gateway. You can cache content, restrict access by IP or domain, force user authentication, and even inspect HTTPS traffic with SSL bumping. The key is to start simple: install Squid, set your port, define one ACL for your network, and test. Once that works, layer on blocks, passwords, and certificates. Always run squid -k parse before reloading, watch your logs, and back up your configuration before major changes. With these steps, you now have a proxy that saves bandwidth, enforces policy, and gives you full visibility into your network traffic.
Want more articles and tutorials like this?
Get new tutorials, security alerts, and IT tips straight to your inbox.
That’s a really useful overview, especially the part about caching. I’ve been meaning to look into Squid for my home network setup.