Understanding LVM in Linux: A Practical Guide to Flexible Storage
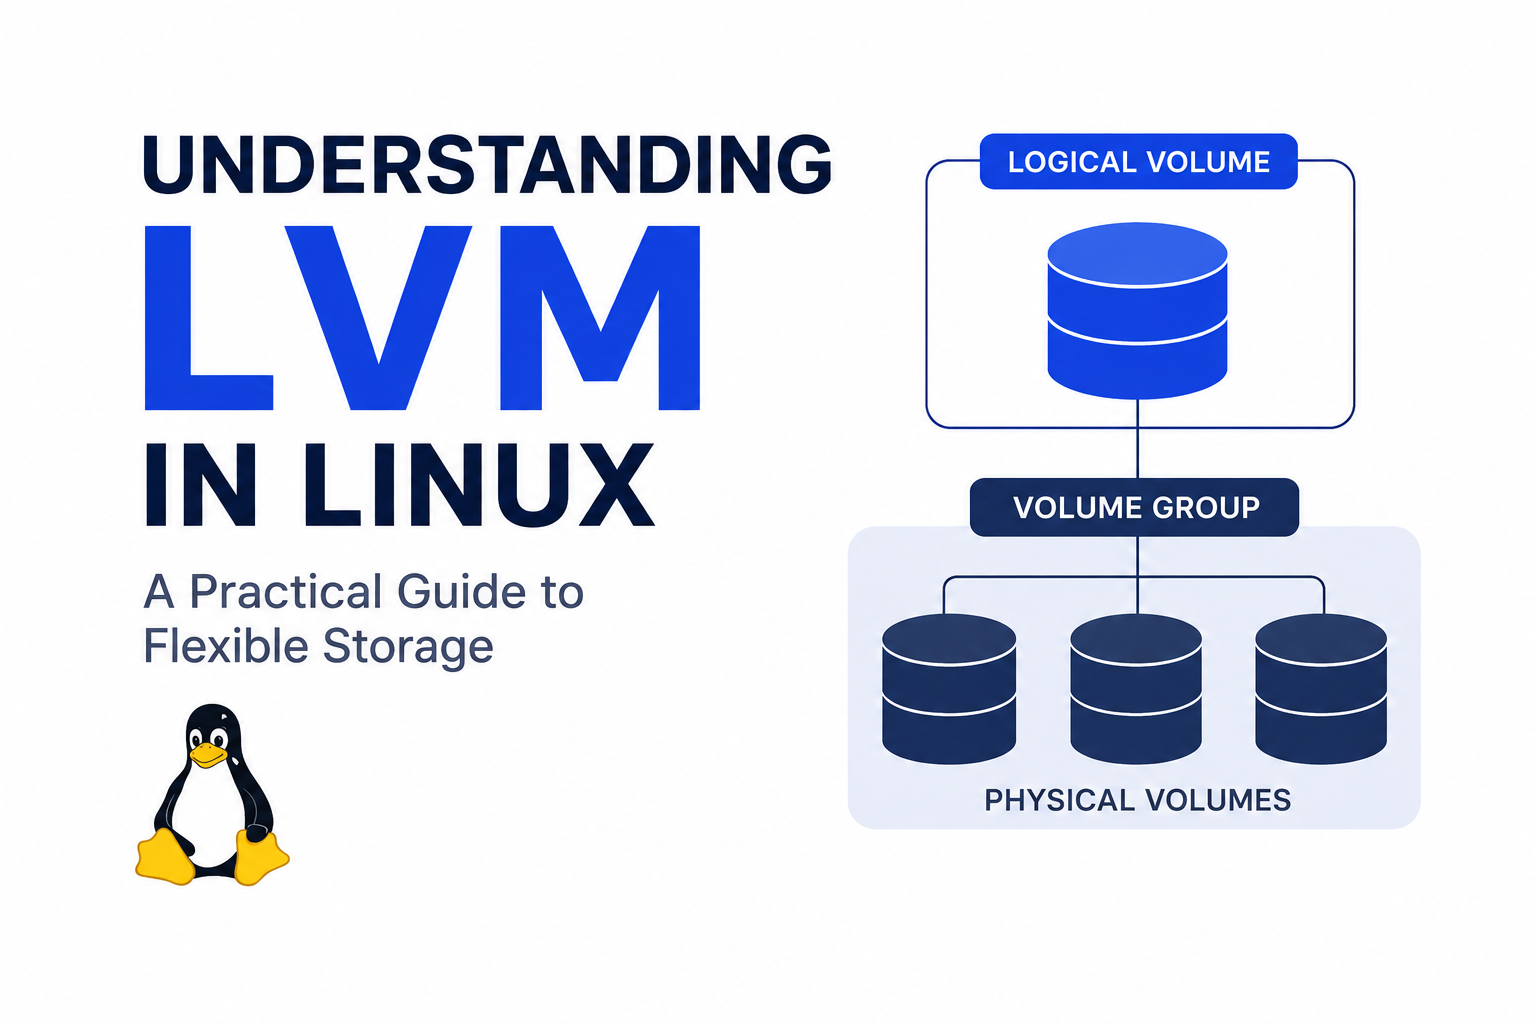
Every sysadmin eventually hits the same wall: a partition runs out of space, and the disk has no room left to grow. Traditional partitioning forces you to rebuild everything from scratch. This is exactly the problem Logical Volume Management (LVM) was built to solve. In this guide, we break down how LVM works in Linux, why it matters for real servers, and how to set it up yourself with hands-on commands.
Table of Contents
- What Is LVM?
- Core LVM Components
- LVM vs Traditional Partitioning
- How LVM Works Under the Hood
- Installing and Setting Up LVM
- Resizing Logical Volumes
- LVM Snapshots
- Common LVM Commands Cheat Sheet
- Best Practices and Common Pitfalls
- Conclusion
What Is LVM?
Logical Volume Management, or LVM, is a storage abstraction layer built into the Linux kernel. Instead of writing filesystems directly onto fixed disk partitions, LVM groups raw storage into pools. It then carves out flexible “logical volumes” from those pools on demand.
This approach separates the physical layout of your disks from how you actually use storage. You can grow a volume, shrink it, move it to a different physical disk, or snapshot it, and none of these actions require you to reboot the server or destroy existing data.
Why LVM Matters
Servers rarely have static storage needs. Databases grow, log files pile up, and virtual machines demand more disk space over time. LVM gives administrators the ability to react to these changes live, which is why almost every enterprise Linux distribution enables LVM by default during installation.
Core LVM Components
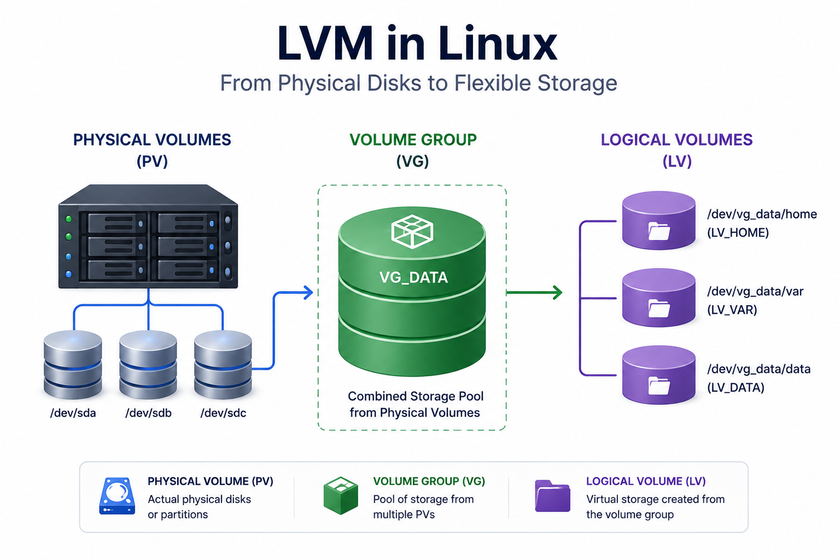
LVM organizes storage into three layers. Understanding each layer is the key to understanding the whole system.
Physical Volumes (PV)
A physical volume is a raw disk or disk partition that LVM takes control of. Before you can use a disk with LVM, you initialize it as a PV. This process writes a small metadata label onto the disk without touching existing partitions on other drives.
Volume Groups (VG)
A volume group pools one or more physical volumes together into a single storage reservoir. Think of a VG as one large bucket of free space, built from as many physical disks as you want to combine. You can add or remove physical volumes from a VG at any time.
Logical Volumes (LV)
A logical volume is a slice you carve out of a volume group. This is what actually gets formatted with a filesystem, such as ext4 or XFS, and mounted into your directory tree. You can have several logical volumes drawn from a single volume group, each sized independently.
| Layer | Real-world equivalent | Command to create |
|---|---|---|
| Physical Volume (PV) | A raw disk added to storage pool | pvcreate |
| Volume Group (VG) | A pool combining multiple disks | vgcreate |
| Logical Volume (LV) | A usable, resizable partition | lvcreate |
LVM vs Traditional Partitioning
Standard disk partitioning (using tools like fdisk or parted) ties a filesystem directly to a fixed-size slice of one physical disk. LVM removes that restriction.
| Feature | Traditional Partitioning | LVM |
|---|---|---|
| Resize without unmounting | No | Yes |
| Combine multiple disks into one volume | No | Yes |
| Live snapshots | No | Yes |
| Move data between physical disks | Requires backup/restore | Built-in (pvmove) |
| Setup complexity | Simple | Moderate |
| Boot partition support | Fully supported | Limited (often needs separate /boot) |
LVM adds a small amount of setup complexity, but the operational flexibility it gives you in return makes it the standard choice for servers, virtual machine hosts, and any environment where storage needs shift over time.
How LVM Works Under the Hood
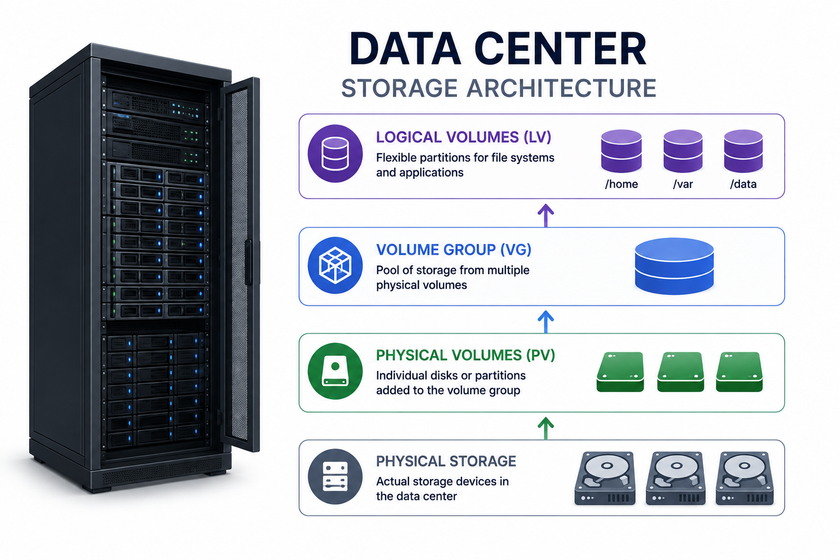
LVM sits between the block device layer and the filesystem layer using the Linux device mapper. When you read or write to a logical volume, the device mapper translates that request into the correct location on the underlying physical volumes.
This translation layer is what makes resizing and moving data possible without downtime. The kernel simply updates its internal mapping tables; it does not need to physically relocate every byte of data unless you explicitly ask it to (for example, during a pvmove).
Installing and Setting Up LVM
Most modern distributions ship with LVM tools preinstalled. If yours doesn’t, install the lvm2 package first.
sudo apt install lvm2This single package gives you every tool you need for the rest of this walkthrough: the physical volume tools (pv*), the volume group tools (vg*), and the logical volume tools (lv*).
Before creating anything, get a quick overview of what LVM already sees on your system. These three commands display a short summary of each layer:
sudo pvs
sudo vgs
sudo lvs
On a fresh install, all three will likely return empty. That’s expected — you haven’t created any LVM structures yet.
Creating Physical Volumes
The first real step is turning raw disk partitions into physical volumes (PVs). In a real deployment, your “free space” often isn’t one clean disk — it’s scattered across several partitions on several drives. LVM handles that without any trouble, since a physical volume can be a whole disk or just one partition on it.
sudo pvcreate /dev/sdb1 /dev/sdc2 /dev/sdd1
sudo pvcreate /dev/sdb2 /dev/sdc1 /dev/sdd3
Here, six separate partitions spread across three physical drives (sdb, sdc, sdd) all become individual physical volumes. LVM doesn’t care that they come from different disks — it will treat all six as raw material for the next layer.
Once initialized, confirm the result:
sudo pvdisplayThis lists every physical volume currently under LVM’s control, along with its size and the volume group it belongs to (if any).
Creating a Volume Group
Next, pool all six physical volumes into a single volume group. This is where the real flexibility of LVM shows up: storage from three different physical disks now behaves as one contiguous pool of free space.
sudo vgcreate IT_GROUP /dev/sdb1 /dev/sdc2 /dev/sdd1 /dev/sdb2 /dev/sdc1 /dev/sdd3IT_GROUP is now the name of your storage pool. Every logical volume you create from this point forward will draw its space from IT_GROUP, regardless of which physical partition that space physically sits on.
Creating Logical Volumes
With the pool in place, carve out usable logical volumes (LVs) by specifying a name and a size.
sudo lvcreate --name IT_VOLUME01 --size 10GB IT_GROUP
sudo lvcreate --name IT_VOLUME02 --size 5GB IT_GROUP
This creates two independent logical volumes, IT_VOLUME01 (10 GB) and IT_VOLUME02 (5 GB), both pulled from the same IT_GROUP pool. You can keep creating more LVs from the same group as long as free space remains.
Formatting the Logical Volumes
A logical volume is just raw block storage until you put a filesystem on it. Format each one with ext4 (or your filesystem of choice):
sudo mkfs.ext4 /dev/IT_GROUP/IT_VOLUME01
sudo mkfs.ext4 /dev/IT_GROUP/IT_VOLUME02
Creating Mount Points and Mounting
Create a directory to act as the access point for each volume, then mount the volume into it.
sudo mkdir /mnt/DISK_IT_VOL01If you want to protect the mount point directory itself from accidental changes (renaming, deletion) before or after mounting, mark it immutable with chattr. Only the superuser can remove this attribute:
sudo chattr +i /mnt/DISK_IT_VOL01Now mount the logical volume onto that directory:
sudo mount /dev/IT_GROUP/IT_VOLUME01 /mnt/DISK_IT_VOL01Repeat the mkdir and mount steps for IT_VOLUME02. To make either mount survive a reboot, add a matching line to /etc/fstab:
echo '/dev/IT_GROUP/IT_VOLUME01 /mnt/DISK_IT_VOL01 ext4 defaults 0 2' | sudo tee -a /etc/fstabResizing Logical Volumes
This is where LVM earns its reputation. You can grow storage on a live system in minutes.
Extending a Logical Volume
First, confirm the volume group has free space, then extend both the logical volume and the filesystem on top of it.
# Check free space in the volume group
sudo vgdisplay IT_GROUP | grep Free

# Extend the logical volume by 5GB
sudo lvextend -L +5G /dev/IT_GROUP/IT_VOLUME01

# Resize the filesystem to match (ext4)
sudo resize2fs /dev/IT_GROUP/IT_VOLUME01

# For XFS filesystems, use this instead
sudo xfs_growfs /mnt/DISK_IT_VOL01
Shrinking a Logical Volume
Shrinking is riskier and only works with ext4, not XFS. Always back up your data first, and unmount the volume before resizing.
sudo umount /mnt/DISK_IT_VOL01
sudo e2fsck -f /dev/IT_GROUP/IT_VOLUME01
sudo resize2fs /dev/IT_GROUP/IT_VOLUME01 8G
sudo lvreduce -L 8G /dev/IT_GROUP/IT_VOLUME01
sudo mount /dev/IT_GROUP/IT_VOLUME01 /mnt/DISK_IT_VOL01
LVM Snapshots
A snapshot captures the exact state of a logical volume at a single point in time. Admins commonly use snapshots before applying updates, so they can roll back instantly if something breaks.
Creating a Snapshot
sudo lvcreate -L 2G -s -n IT_VOLUME01_snap /dev/IT_GROUP/IT_VOLUME01The snapshot only stores changed blocks, so it uses far less space than a full copy, as long as you take it before major changes and remove it soon after.
Restoring from a Snapshot
sudo umount /mnt/DISK_IT_VOL01
sudo lvconvert --merge /dev/IT_GROUP/IT_VOLUME01_snap
The system merges the snapshot back into the original volume on the next reboot or mount, reverting all changes made since the snapshot was taken.
Common LVM Commands Cheat Sheet
| Task | Command |
|---|---|
| List physical volumes | pvdisplay or pvs |
| List volume groups | vgdisplay or vgs |
| List logical volumes | lvdisplay or lvs |
| Add a disk to a VG | vgextend IT_GROUP /dev/sde1 |
| Remove a logical volume | lvremove /dev/IT_GROUP/IT_VOLUME01 |
| Remove a volume group | vgremove IT_GROUP |
| Rename a logical volume | lvrename IT_GROUP old_lv new_lv |
| Move data between disks | pvmove /dev/sdb |
Best Practices and Common Pitfalls
Keep these points in mind before you roll LVM out on production systems:
- Always leave free space in your volume group. Reserve at least 10-15% unallocated space for snapshots and emergency growth.
- Prefer XFS for large volumes you plan to grow. XFS handles online growth cleanly, though it does not support shrinking.
- Label your volumes clearly. Names like
web_lvordb_lvsave time during incident response. - Back up before shrinking anything. Shrink operations carry real risk of data loss if interrupted.
- Monitor volume group capacity. Tools like
vgsand monitoring agents can alert you before a group fills up. - Avoid putting
/booton LVM unless your bootloader explicitly supports it, since some bootloaders cannot read LVM metadata.
Conclusion
LVM turns Linux storage from a rigid, one-time decision into something you can reshape as your needs change. By separating physical disks (PVs) from pooled storage (VGs) and the usable volumes built on top (LVs), you gain the ability to grow, shrink, snapshot, and migrate data with minimal disruption. For any server that expects to run for years rather than weeks, setting up LVM from day one saves painful migrations down the road. Start small, test resizing and snapshots on a non-production system, and once you’re comfortable with the workflow, apply it to your critical infrastructure.
Want more articles and tutorials like this?
Get new tutorials, security alerts, and IT tips straight to your inbox.